 Azeroth DB
Dire Maul
5 players · Feralas 62.0, 33.3
Start in East if your group needs Pusillin's Crescent Key before entering West or North. East ends at Alzzin the Wildshaper, West leads through Immol'thar to Prince Tortheldrin, and North ends at King Gordok. A North group must decide before fighting the guards whether to clear them or preserve them for a tribute attempt.
Preparation
Have someone carry the Crescent Key for West or North. If the group needs it, enter East and speak to Pusillin at every stop of his chase before fighting him on the final platform.
For a North tribute attempt, arrange lockpicking or an engineer with Engineering 275 and a Powerful Seaforium Charge for the inner door. This avoids killing Guard Mol'dar to obtain access.
Bring Frost Oil and a Thorium Widget to repair the broken trap on Guard Slip'kik's patrol route. Repair it while the guard is elsewhere, then let the patrol reach it.
Bring a Gordok Ogre Suit for the player who will speak to Captain Kromcrush on a tribute route. Wear the disguise and use the conversation to pass the captain instead of starting his fight.
If a warlock can start the optional ritual after Immol'thar, bring J'eevee's Jar, Black Lodestone, Xorothian Glyphs and Soul Shards. The Black Lodestone consumes a Soul Shard each time it restarts a failing ritual node.


East: side chambers
Speak to Pusillin near the entrance before taking the upper route if the group needs the key. Follow his stops to the final platform, then work through the satyr side rooms and the pool. After defeating Zevrim at the altar, return to the Conservatory and have the barrier toward Alzzin opened.
Creatures
- Warpwood TanglerElite Elemental
Warpwood Tanglers can root a player while casting Lightning Bolt. Pull them into a cleared section before engaging so a rooted healer can keep the tank in sight.

Entangling Roots
Entangles an enemy in roots, inflicting Nature damage every 3 sec. and immobilizing it for up to 10 seconds.

Lightning Bolt
Blasts an enemy with lightning, inflicting Nature damage.
- Wildspawn HellcallerElite Demon
Wildspawn Hellcallers place Rain of Fire over the party's position. Leave the burning area immediately and interrupt their fire casting rather than keeping the whole pull inside it.

Rain of Fire

Fireball
Inflicts Fire damage to an enemy.
- Wildspawn FelswornElite Demon
Wildspawn Felsworn cast Fear as well as Shadow Bolt. Interrupt Fear first and fight with cleared ground behind the party so a fleeing player does not reach another satyr pack.

Fear
Strikes fear in an enemy, causing it to flee in terror for 4 seconds. Only 1 target can be feared at a time.

Shadow Bolt
Hurls a bolt of dark magic at an enemy, inflicting Shadow damage.
- Wildspawn ImpDemon
Wildspawn Imps accompany Pusillin's final stand. Collect them before healing draws their Fire Blasts away from the platform, and use area damage on the imps while Pusillin reflects spells.

Fire Blast
Inflicts Fire damage to an enemy.
Zevrim Thornhoof
Elite DemonZevrim's Sacrifice forces the healer to keep an immobilized altar victim alive while Intense Pain damages players near the fight.
Abilities

Sacrifice
Heal the player moved to the altar immediately; Sacrifice stuns them and leeches health, so they cannot rely on their normal actions to survive.

Intense Pain
Inflicts 200 Shadow damage to nearby enemies every 3 sec. for 15 seconds.
Keep ranged players outside the nearby damage and remove Intense Pain as a magic debuff, especially while another player is being sacrificed.
 Tank
Tank- Keep Zevrim where the healer can reach both you and the altar. Do not chase a displaced party member so far that the next Sacrifice leaves its victim outside healing range.
 Healer
- Watch the altar and switch healing to the Sacrifice victim as soon as they are moved. Remove Intense Pain when you can do so without allowing the health leech to kill that player.
 Damage
- Fight away from the healer's route to the altar and keep ranged attacks outside Intense Pain's nearby area. Continue damaging Zevrim while the sacrificed player is unable to act.
Hydrospawn
Elite ElementalHydrospawn combines a weapon disarm and knockback with summoned water adds that can reach the healer.
Abilities

Riptide
Riptide disarms affected weapon users. Remove the magic effect from the tank promptly so weapon-based threat can resume.

Submersion
Reduces the Stamina of nearby enemies by 10 for 1 minute.
Submersion reduces Stamina. Remove this magic debuff when healing permits rather than leaving the group with less health for the next hit.

Hydrojet
Keep cleared ground behind the tank for Hydrojet's knockback and slow; avoid recovering through another pool-side pack.
Summon Hydroling
Pick up the summoned water adds before they settle on the healer, then use focused area damage to remove them.
- Tank
- Clear the pool-side pull area, leave a safe landing direction for Hydrojet, and collect the water adds when they appear. Call out Riptide when the disarm interrupts your weapon-based threat.
- Healer
- Remove Riptide from the tank and Submersion from endangered players when your magic dispel is available. Stay near the cleared pull area so the tank can collect summons that approach you.
- Damage
- Switch to the summoned water adds after the tank collects them. Stop advancing around the pool when Hydrojet displaces the tank; let the pull return to the cleared area.

Lethtendris pairs interruptible Void Bolts and curses with Pimgib's fire attacks, so leaving the companion alive makes the healing harder.
Abilities
Void Bolt
Reserve an interrupt for Lethtendris's Void Bolt instead of spending it on Pimgib immediately before this cast.

Curse of Tongues
Forces an enemy to speak in Demonic, reducing its casting speed by 50% for 15 seconds. Only one curse per warlock can be active on any one target.
Remove Curse of Tongues from the healer and assigned interrupters before the casting penalty delays their next response.

Curse of Thorns
Remove Curse of Thorns from an attacking player to stop their attacks from triggering additional damage.

Immolate
Burns an enemy, then inflicts additional Fire damage every 3 sec. for 21 seconds.
Remove Immolate's magic damage over time before Pimgib's fire pressure compounds it.
Shadow Bolt Volley
Hurls missiles of dark magic, inflicting Shadow damage to nearby enemies.
Recover the party after Shadow Bolt Volley while keeping the next Void Bolt covered by an interrupt.

Enlarge
Remove Enlarge from Pimgib with an offensive magic dispel if available; the enlarged companion gains damage and faster casting.

Blast Wave
Unleashes a wave of flame, inflicting Fire damage to nearby enemies and reducing their movement speed for 6 seconds.
Pimgib's Blast Wave damages and slows nearby players. Keep the healer outside his melee cluster.
Flame Buffet
Pimgib's Flame Buffet increases subsequent Fire damage taken. Defeat him first rather than allowing that vulnerability to amplify his other fire attacks.
- Tank
- Establish control of both Lethtendris and Pimgib before the first volley. Keep the companion close enough for focused damage but away from the healer so Blast Wave does not slow the healer's movement.
- Healer
- Remove Immolate and prepare for Pimgib's fire attacks while Enlarge is active. Ask the curse remover to clear Curse of Tongues from you before it delays healing through a volley.
- Damage
- Defeat Pimgib first while leaving an interrupt assigned to Lethtendris's Void Bolt. Remove Enlarge if you can, and keep curse removal assigned while the party is focusing the companion.
Pusillin
Elite DemonPusillin's chase ends in an imp pull where Spirit of Runn Tum makes direct spell attacks dangerous to their caster.
Abilities
Fireball
Inflicts Fire damage to an enemy.
Interrupt Pusillin's Fireball when you can do so without casting a reflected spell into Spirit of Runn Tum.
Fire Blast
Inflicts Fire damage to an enemy.
Account for Fire Blast while collecting the accompanying imps; it adds immediate Fire damage rather than a cast to wait on.
Blast Wave
Unleashes a wave of flame, inflicting Fire damage to nearby enemies and reducing their movement speed for 6 seconds.
Keep ranged players and the healer outside the nearby Blast Wave so its damage and slow do not catch the whole platform group.

Spirit of Runn Tum
Pause direct offensive spells into Pusillin while Spirit of Runn Tum is active. Use weapon damage on him or direct spells at the accompanying imps instead.
- Tank
- Start the final platform fight with the party together so you can collect the imps before healing attracts them. Expect faster melee attacks while Spirit of Runn Tum is active.
- Healer
- Stand outside Pusillin's Blast Wave area and keep the tank healthy through Spirit of Runn Tum. Stay within the cleared platform area if the accompanying imps turn toward you.
- Damage
- Remove the imps while spell reflection is active on Pusillin. Weapon users can continue on the boss; spellcasters should avoid reflecting direct damage back onto themselves.
East: Alzzin's chamber
Clear the Warpwood Crushers on the ramp before pulling Alzzin. Keep the cleared ramp behind the tank so Knock Away cannot send them into another Crusher.
Creatures
- Warpwood CrusherElite Elemental
Warpwood Crushers combine Crush Armor with nearby Trample damage. Fight each pull separately, keep ranged players outside the melee cluster, and let armor reductions expire before taking another Crusher when the tank is struggling.

Crush Armor

Trample
Inflicts Physical damage to nearby enemies.
Alzzin the Wildshaper
Elite DemonAlzzin's changing forms combine tank displacement and weapon disarms with mana drain, disease and self-healing that need different responses.
Abilities

Enervate
Remove Enervate as a poison, especially from the healer, before its repeated mana drain limits the group's healing.

Wither
Remove Wither as a disease; it combines Nature damage with reduced Strength, making it particularly disruptive on the tank.

Wild Regeneration
Interrupt Wild Regeneration, or remove the healing buff with an offensive magic dispel if the cast succeeds.
Disarm
Disarms an enemy, forcing it to stop wielding its weapon for 6 seconds.
A disarmed tank needs threat tools that do not require the weapon. Give them time to keep Alzzin controlled instead of increasing damage during the disarm.

Knock Away
Inflicts normal damage plus 30 to an enemy and knocks it back.
Keep the tank's back toward cleared ground so Knock Away does not send them into a surviving ramp pack.

Thorns
Remove Thorns with an offensive magic dispel when possible to stop melee attacks from returning Nature damage.

Mangle
Inflicts 200 damage to an enemy every 2 sec. and slows its movement by 50% for 20 seconds.
Heal the Mangle victim through its repeated damage and slow; do not confuse this effect with Wither when assigning disease removal.

Dire Wolf Form
Prioritize the tank's health during Dire Wolf Form rather than spending the entire window on nonessential debuff removal.
- Tank
- Use the cleared ramp as the safe direction for Knock Away. Keep non-weapon threat options available for Disarm, and regain contact with Alzzin before the group increases damage.
- Healer
- Remove Enervate from mana users and Wither from the tank with the appropriate poison or disease removal. Keep healing the Mangle victim and preserve a defensive response for Dire Wolf Form.
- Damage
- Keep Wild Regeneration interrupted and remove Thorns if your group has an offensive magic dispel. Ease damage when Disarm or Knock Away prevents the tank from maintaining contact.
West: gardens and upper halls
Clear the trees around Tendris before engaging him, then work through the upper halls. Clear the guardians around each pylon along the way; defeating the named enemies alone does not open Immol'thar's prison. Tsu'zee is an optional rare encounter in the halls, not a required stop before the prison.
Creatures
- Eldreth SorcererElite Undead
Eldreth Sorcerers can remove a player with Polymorph while Chain Lightning crosses nearby party members. Interrupt Polymorph and separate ranged players before the lightning cast.

Polymorph
Transforms an enemy into a sheep, forcing it to wander around for up to 20 seconds. While wandering, the sheep cannot attack or cast spells, but regenerates very quickly. Any damage will transform the target back into its normal form. Only one target can be polymorphed at a time. Only works on beasts, dragons, giants, humanoids, and critters.

Chain Lightning
Strikes an enemy with a lightning bolt that arcs to another nearby enemy. The spell affects up to 3 targets, causing Nature damage to each.
- Eldreth SpectreElite Undead
Eldreth Spectres use Greater Invisibility. Leave room behind the current pull and check the route before bringing the party forward; an apparently empty passage can still contain a Spectre.

Greater Invisibility
Turns the caster invisible until the effect is cancelled.
- Arcane AberrationElite Elemental
Arcane Aberrations threaten the healer's mana with Mana Burn. Keep mana users back when finishing these pylon guardians instead of stacking the party on the dying elemental.

Mana Burn
- Mana RemnantElite Elemental
Mana Remnants combine Blink with Chain Lightning. Keep their new position inside the cleared pull area and spread the ranged group so a blink does not put the lightning caster beside every mana user.

Blink
Teleports the caster 20 yd. forward unless something is in the way. Also frees the caster from any bonds.
Chain Lightning
Strikes an enemy with a lightning bolt that arcs to another nearby enemy. The spell affects up to 3 targets, causing Nature damage to each.
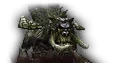
Tendris Warpwood
Elite ElementalTendris combines nearby vine damage and roots with Uppercut, making healer range and a cleared landing area matter throughout the fight.
Abilities

Grasping Vines
Inflicts Physical damage to nearby enemies, knocking them down and immobilizing them for 10 seconds.
Keep ranged players out of the nearby vine attack. Remove Grasping Vines as a magic effect when its immobilization prevents the tank or healer from recovering position.
Entangle
Entangles an enemy in roots, inflicting Nature damage every 3 sec. and immobilizing it for up to 10 seconds.
Keep the rooted player healed through Entangle. Do not plan on ordinary magic dispelling to remove this root.
Uppercut
Inflicts normal damage plus 50 to an enemy, knocking it back.
Put a cleared wall or boundary behind the tank before Uppercut knocks them back.
Trample
Leave only necessary melee players near Tendris for Trample, so its nearby damage does not compete with healing the rooted player.
- Tank
- Clear the surrounding trees, then position for Uppercut to land on cleared ground. Keep Tendris within the healer's reach if roots prevent the healer from following your displacement.
- Healer
- Remove Grasping Vines when its magic root disrupts positioning, but heal through Entangle rather than relying on the same dispel. Stand outside Trample while remaining in range of the tank's landing area.
- Damage
- Ranged players should stay outside Grasping Vines and Trample. If the tank is knocked away while the healer is rooted, allow the tank to return instead of drawing Tendris farther across the garden.
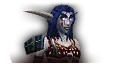
Illyanna's Volley and trap restrict safe positions while Ferra adds a charging melee attacker that the tank must hold.
Abilities

Volley
Continuously fires a volley of ammo at the target area, causing 300 Arcane damage to enemy targets within 8 yards every second for 6 seconds.
Leave Volley's target area as soon as the arrows begin rather than spreading only after the channel has damaged the group.

Immolation Trap
Place a fire trap that will burn the first enemy to approach for 690 Fire damage over 15 seconds. Trap will exist for 1 minute. Traps can only be placed when out of combat. Only one trap can be active at a time.
Avoid an armed Immolation Trap and move the fight away from it so melee players do not have to cross the trap to reach Illyanna.

Concussive Shot
Dazes an enemy, reducing its movement speed by 50% for 3 seconds.
Concussive Shot slows its victim. Keep a short, clear exit from the Volley area so the slowed player can still leave it.

Charge
Charges an enemy, inflicting normal damage plus 0 and stuns the opponent for 2 seconds.
Ferra's Charge can stun a player away from the tank. Let the tank collect the bear again instead of leading it through an uncleared hall.
- Tank
- Hold Ferra as well as Illyanna and move their melee position away from an armed Immolation Trap. Recover Ferra after a Charge without dragging the fight into another hall pack.
- Healer
- Keep an exit from Volley clear and watch a charged or slowed player who cannot reposition immediately. Stand away from the melee cluster so Ferra and Illyanna do not keep every hazard on the same player.
- Damage
- Focus Illyanna while Ferra stays controlled. Leave Volley promptly, and follow the tank around Immolation Trap instead of crossing it to continue attacking.
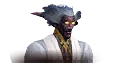
Magister Kalendris
Elite UndeadKalendris's Shadowform strengthens Shadow damage while reducing incoming melee damage, so interrupting Mind Flay matters more than forcing melee damage through the form.
Abilities

Shadowform
Assumes a Shadowform, increasing Shadow damage dealt by 40% and reducing melee damage taken by 40%. Shadowform lasts until cancelled.
Expect stronger Shadow attacks and reduced melee effectiveness during Shadowform. Keep interrupts available instead of trying to offset the form only with more melee attacks.

Mind Flay
Inflicts Shadow damage to an enemy and reduces its movement speed for 3 seconds.
Interrupt Mind Flay to end its Shadow-damage channel and movement reduction.
Shadow Word: Pain
Utters a word of darkness, inflicting Shadow damage to an enemy every 3 sec. for 18 seconds.
Remove Shadow Word: Pain as a magic debuff before its repeated damage overlaps another Shadow attack.

Mind Blast
Inflicts Shadow damage to an enemy, but causes a high amount of threat.
Use an available interrupt on Mind Blast when the tank is already low, but retain coverage for the next Mind Flay.
- Tank
- Keep Kalendris in the cleared hall with melee interrupts in reach. Use a defensive response when Shadowform overlaps an uninterrupted Shadow cast rather than advancing into the next pack.
- Healer
- Remove Shadow Word: Pain and prepare for increased Shadow damage during Shadowform. Keep the slowed Mind Flay victim in range while an interrupter ends the channel.
- Damage
- Coordinate Mind Flay interrupts. Spell damage avoids Shadowform's melee reduction; melee players should preserve their interrupts even when their attacks are less effective.
Tsu'zee
Elite UndeadTsu'zee is an optional rare encounter where Gouge interrupts tank control and Blind can disable the player expected to keep the group alive.
Abilities

Gouge
Inflicts 20 damage to an enemy and stuns it for up to 4 seconds. You will automatically stop attacking. Target must be facing you. Any damage received by the stunned target will revive it.
Be ready to control Tsu'zee while the tank is incapacitated by Gouge rather than assuming the tank can immediately intercept him.

Blind
Blinds the target, causing it to wander confused for up to 10 seconds. Any damage caused will remove the effect.
Plan a backup defensive or healing response if Blind disables the healer. Do not rely on an ordinary poison cleanse to remove it.

Backstab
Keep Tsu'zee in front of the tank; Backstab requires him to be attacking from behind.

Sinister Strike
Keep the active target healthy for Sinister Strike while the tank is recovering from Gouge or the healer is blinded.
- Tank
- Pull the rare encounter into cleared hall space and keep your front toward Tsu'zee to deny Backstab. Recover him after Gouge while another player controls his movement away from the healer.
- Healer
- Stand on cleared ground so Blind's wandering does not take you toward another pack. Keep a non-tank target alive while Gouge temporarily prevents the tank from acting.
- Damage
- Help stop Tsu'zee from reaching the healer during Gouge and keep a defensive available if Blind removes healing support. This side fight is optional; continue through West if the rare is absent.
West: demon prison
Finish the remaining pylon guardian packs before approaching Immol'thar. Clear the prison before starting an optional warlock ritual there; Lord Hel'nurath belongs to that summon, not an ordinary West clear. Groups without a ritual continue to the library after Immol'thar.
Creatures
- Residual MonstrosityElite Elemental
Residual Monstrosities knock their target back with Arcane Blast and summon Mana Bursts. Put a cleared boundary behind the tank and leave space to move away from the summons rather than letting the knockback carry the pull into another pylon pack.

Arcane Blast

Summon Mana Bursts
Immol'thar
Elite DemonImmol'thar divides attention between the tank's Infected Bite, summoned eyes and a portal that can separate a player from the fight.
Abilities

Eye of Immol'thar
Assign ranged damage to destroy the summoned eyes before returning to Immol'thar, keeping the tank on the boss.

Portal of Immol'thar
Track the player moved by Portal of Immol'thar. If it takes the tank away, pause damage until the tank is back in control.

Infected Bite
Inflicts Nature damage to an enemy every 10 sec. and increases the Physical damage it takes for 3 minutes.
Remove Infected Bite as a disease; it causes repeated Nature damage and increases the victim's incoming Physical damage.
Trample
Keep the healer and assigned eye killer outside Trample's nearby melee damage.
Enrage
Keep a defensive response available for Enrage, especially if Infected Bite remains on the tank.
- Tank
- Hold Immol'thar on cleared prison ground while the assigned ranged player handles the eyes. Re-establish control after a portal displacement before the group resumes full damage.
- Healer
- Remove Infected Bite and watch the portal target as well as the tank. Keep ranged healing space outside Trample, and prepare for Enrage if the disease has not been removed.
- Damage
- Keep the assigned eye killer on new summons instead of making the tank chase them. Pause when the tank is moved by the portal and resume once Immol'thar is controlled again.
Lord Hel'nurath is an optional warlock-ritual summon whose healing-reduction curse and Sleep complicate controlling the Xorothian Dreadsteed at the same time.
Abilities
Knock Away
Inflicts normal damage plus 30 to an enemy and knocks it back.
Give the tank a cleared landing direction for Knock Away so the lord does not move the fight out of the prison's prepared area.
Shadow Word: Pain
Utters a word of darkness, inflicting Shadow damage to an enemy every 3 sec. for 18 seconds.
Remove Shadow Word: Pain as magic damage over time before it overlaps a healing-reduction curse on the same player.

Sleep
Puts an enemy to sleep for up to 10 seconds. Any damage caused will awaken the target. Only one target can be asleep at a time.
Remove Sleep as a magic effect, especially from a player controlling one of the ritual's attackers.

Veil of Shadow
Reduces healing effects for an enemy by 75% for 8 seconds.
Remove Veil of Shadow as a curse before spending repeated heals into its healing reduction.
- Tank
- Keep control of the Xorothian Dreadsteed when Hel'nurath joins and make sure the lord is collected before healing draws him away. Keep both attackers on cleared prison ground with a safe direction for Knock Away.
- Healer
- Have curse removal assigned for Veil of Shadow and magic removal available for Sleep and Shadow Word: Pain. Prioritize freeing the player who is controlling an attacker, then restore healing effectiveness on the wounded target.
- Damage
- Focus Hel'nurath while the Dreadsteed remains controlled. A player who can remove curses should clear Veil of Shadow promptly instead of leaving the healer to work against its reduction.
West: library
Return to the library after Immol'thar falls to confront Prince Tortheldrin. Choose a wall for the tank's back and leave an open path for melee players to retreat from Whirlwind.
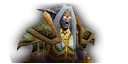
Prince Tortheldrin
Elite HumanoidTortheldrin combines Arcane Blast displacement with Whirlwind and Counterspell, so losing tank contact also leaves the group exposed to interrupted healing.
Abilities
Arcane Blast
Use the library wall to limit Arcane Blast's knockback. Pause damage while the tank recovers position rather than pulling Tortheldrin across the room.

Whirlwind
Leave Tortheldrin's nearby Whirlwind attack instead of remaining beside him through the spin.

Counterspell
Counters an enemy's spell, preventing the enemy from casting that spell again for 15 seconds. Generates a high amount of threat.
Keep the tank healthy before Counterspell can interrupt a heal; do not depend on finishing a long cast when the tank is already in danger.

Thrash
Gives the caster 2 extra attacks.
Thrash adds melee attacks. Preserve a tank defensive for a burst that lands while the healer is interrupted.
- Tank
- Anchor your back against a library wall for Arcane Blast and bring Tortheldrin back to the same spot after displacement. Use a defensive if Thrash arrives while Counterspell prevents the healer from completing their response.
- Healer
- Stand outside Whirlwind and keep the tank healthy enough to survive an interrupted heal followed by extra melee attacks. Follow the tank's wall position rather than moving into Tortheldrin's spin to shorten the distance.
- Damage
- Melee players should leave Whirlwind and return when it ends. After Arcane Blast displaces the tank, hold damage until they recover instead of making Tortheldrin chase another player through the library.
North: courtyard
Choose a guard clear or a tribute attempt before engaging Mol'dar. For tribute, avoid the named ogres and take the Gordok Courtyard Key from Fengus's Chest while the patrol is away. Clear the caster packs you need to pass rather than trying to move the group through their Polymorph casts.
Creatures
- Gordok Mage-LordElite Humanoid
Gordok Mage-Lords combine Polymorph with Frostbolt. Assign an interrupt to Polymorph and keep the party together on cleared ground so a slowed tank does not lose contact with the healer while advancing through the courtyard.
Polymorph
Transforms an enemy into a sheep, forcing it to wander around for up to 20 seconds. While wandering, the sheep cannot attack or cast spells, but regenerates very quickly. Any damage will transform the target back into its normal form. Only one target can be polymorphed at a time. Only works on beasts, dragons, giants, humanoids, and critters.

Frostbolt
Inflicts Frost damage to an enemy and reduces its movement speed for 4 seconds.
Guard Mol'dar
Elite HumanoidMol'dar's charge and knockback can turn a guard fight into an entrance-pack pull unless the party clears its fighting space first.
Abilities
Knock Away
Inflicts normal damage plus 30 to an enemy and knocks it back.
Put cleared ground behind the tank so Knock Away cannot send them into another entrance pack.

Shield Bash
Bashes an enemy with the caster's shield, inflicting Physical damage and interrupting the spell being cast for 8 seconds.
Keep the healer outside Mol'dar's melee reach so Shield Bash does not interrupt the heal needed after a knockback.
Shield Charge
Charges an enemy, knocking it back and inflicting normal damage plus 150.
Choose ranged positions with a clear path back to the tank for Shield Charge, rather than standing beside an untouched mastiff pack.

Strike
Strikes at an enemy, inflicting increased melee damage.
Keep the tank healthy for Strike while Mol'dar is being brought back from a charge.
Enrage
Save a defensive response for Enrage instead of using every defensive while clearing the entrance trash.
- Tank
- For a guard clear, remove the nearby mastiff pull first and set your back toward a cleared boundary. Recover Mol'dar after Shield Charge without advancing toward the next entrance pack.
- Healer
- Stay outside Shield Bash reach and inside the cleared entrance area. Be ready for Strike as Mol'dar returns to the tank and for increased pressure during Enrage.
- Damage
- Keep your charge position away from untouched mastiffs and let Mol'dar return to the tank before resuming full damage. On a tribute route, bypass the guard instead of starting this fight.
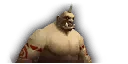
Stomper Kreeg
<The Drunk>Elite HumanoidKreeg's Booze Spit damages frontal attackers' accuracy while Whirlwind and War Stomp punish a party stacked in melee.
Abilities

Booze Spit
Keep everyone except the tank behind Kreeg to avoid Booze Spit's frontal attack-accuracy penalty.
Whirlwind
Melee damage dealers should retreat from Whirlwind instead of adding its damage to the tank's healing requirement.

War Stomp
Keep the healer outside War Stomp's nearby knockback and stun so healing continues when melee players are disabled.
- Tank
- Point Booze Spit away from the party. If its accuracy penalty disrupts your attacks, use available threat tools while the party holds damage rather than turning Kreeg through the healer.
- Healer
- Stand outside Kreeg's Whirlwind and War Stomp range. Keep healing space behind him so Booze Spit does not catch you when the tank adjusts position.
- Damage
- Attack from behind to avoid Booze Spit's accuracy loss and step away during Whirlwind. Leave Kreeg alone on a tribute attempt rather than engaging him for an ordinary clear.
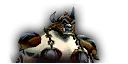
Guard Fengus
Elite HumanoidFengus's patrol makes it necessary to choose cleared fighting ground before his charge and knockback carry players along the courtyard route.
Abilities
Knock Away
Inflicts normal damage plus 30 to an enemy and knocks it back.
Fight with the tank's back toward cleared courtyard ground instead of the next section of Fengus's patrol.
Shield Bash
Bashes an enemy with the caster's shield, inflicting Physical damage and interrupting the spell being cast for 8 seconds.
Keep healing and casting positions outside Shield Bash reach when Fengus returns from his patrol path.
Shield Charge
Charges an enemy, knocking it back and inflicting normal damage plus 150.
Stand where Shield Charge cannot pull Fengus through an uncleared courtyard pack on the way back to the tank.
Strike
Strikes at an enemy, inflicting increased melee damage.
Keep health available for Strike when Fengus reaches his melee target again after a charge.
Enrage
Use a defensive response for Enrage without abandoning the cleared courtyard position.
- Tank
- Intercept Fengus on a cleared part of his patrol and anchor there for Knock Away. Do not chase him through the courtyard after a charge if doing so brings another pack into combat.
- Healer
- Choose a charge destination with a safe return path to the tank and remain outside Shield Bash reach. Prepare for Enrage while keeping the tank's knockback landing area in healing range.
- Damage
- For a guard clear, wait for Fengus to enter the cleared pull area before attacking. For tribute, take the courtyard key during a patrol gap without damaging the guard.
North: inner halls
On a tribute route, use the repaired trap to stop Slip'kik, open the inner door without killing Mol'dar, and send the disguised player to speak to Kromcrush. A guard clear fights Slip'kik and Kromcrush instead. Clear the nearby halls before Kromcrush's fear can scatter the party into another pull.
Creatures
- Gordok WarlockElite Humanoid
Gordok Warlocks can Banish a party member and leave Immolate burning on another. Interrupt Banish before it removes the tank or healer from the pull, then remove Immolate's magic damage over time.

Banish
Banishes an enemy, preventing all action but making it invulnerable for up to 15 seconds. Only one target can be banished at a time.
Immolate
Burns an enemy, then inflicts additional Fire damage every 3 sec. for 21 seconds.
- Gordok ReaverElite Humanoid
Gordok Reavers combine Mortal Strike's healing reduction with Sunder Armor. Control a Reaver when several arrive together instead of leaving the tank to take reduced healing against every armor-reducing attacker.

Mortal Strike
Inflicts 130% weapon damage and leaves the target wounded, reducing the effectiveness of any healing by 50% for 5 seconds.

Sunder Armor
- Gordok CaptainElite Humanoid
Gordok Captains cast Fear in the halls. Interrupt the cast and pull back from the next pack before fighting; a fleeing player can cross a doorway the group has not cleared.
Fear
Strikes fear in an enemy, causing it to flee in terror for up to 8 seconds. Only 1 target can be feared at a time.
Guard Slip'kik
Elite HumanoidSlip'kik can be trapped for a bypass; fighting him instead means containing Shield Charge beside the inner halls.
Abilities
Knock Away
Inflicts normal damage plus 30 to an enemy and knocks it back.
Keep the tank's knockback direction away from the next hall pull and inside the area the group already cleared.
Shield Bash
Bashes an enemy with the caster's shield, inflicting Physical damage and interrupting the spell being cast for 8 seconds.
Keep the healer away from Slip'kik's Shield Bash while the tank holds him near the patrol route.
Shield Charge
Charges an enemy, knocking it back and inflicting normal damage plus 150.
Leave a clear route between ranged players and the tank so Shield Charge does not cross an uncleared doorway.
Strike
Strikes at an enemy, inflicting increased melee damage.
Keep the tank healthy for Strike rather than spending the whole charge window healing damage dealers first.
Enrage
Retain a tank defensive for Enrage if the group chooses the fight instead of repairing the trap.
- Tank
- For tribute, keep the party out of Slip'kik's path while the trap is repaired and let the patrol enter it. For a fight, hold him with a cleared knockback direction before the group passes into the next hall.
- Healer
- If fighting Slip'kik, stay outside Shield Bash reach and keep the tank's recovery path in range after Shield Charge. Preserve healing for Strike and Enrage rather than moving ahead through the doorway.
- Damage
- For tribute, keep area attacks away from the trapped guard and continue past him. If fighting, choose a charge position that does not bring Slip'kik through another hall pack.
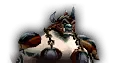
Kromcrush's Mortal Cleave reduces healing while Retaliation punishes frontal melee attacks and summoned Reavers add their own healing reduction.
Abilities
Mortal Cleave
Inflicts 150% weapon damage and leaves the target wounded, reducing the effectiveness of any healing by 50% for 5 seconds.
Keep Mortal Cleave away from the party and use a defensive response while its healing reduction is on the tank.

Intimidating Shout
Shouts at an enemy, paralyzing it with terror for 8 seconds. and causing all other nearby enemies to flee in fear.
Fight with cleared ground around the party before Intimidating Shout scatters players; use an available fear break to recover control of the captain and Reavers.

Retaliation
Instantly counterattack any enemy that strikes you in melee for 15 seconds. Melee attacks made from behind cannot be counterattacked.
Melee damage dealers must attack Kromcrush from behind during Retaliation. Frontal melee hits trigger counterattacks.
Call Reavers
Collect the summoned Gordok Reavers before they reach the healer and control a Reaver to avoid taking every healing-reduction attack at once.
Enrage
Keep a defensive response for Kromcrush's Enrage, especially while Mortal Cleave is reducing incoming healing.
- Tank
- Keep the party out of Mortal Cleave and collect the Reavers on cleared ground. During Retaliation, avoid unnecessary frontal melee swings and use available threat tools that do not cause counterattacks.
- Healer
- Keep the tank healthy before Mortal Cleave lands and expect reduced healing while it is active. Stay near the cleared retreat area so Intimidating Shout does not leave you beside an untouched pack.
- Damage
- For a fight, attack Kromcrush from behind during Retaliation and help control the Reavers before returning to him. For tribute, use the ogre disguise and conversation instead of damaging the captain.
North: throne
Pull King Gordok and Cho'Rush into cleared space away from the side packs. A normal clear can defeat Cho'Rush first; a tribute attempt assigns someone to occupy him and interrupt his healing while the group defeats Gordok without killing the observer.
Cho'Rush the Observer
Elite HumanoidCho'Rush can prolong Gordok's fight with healing, so the party needs a separate handler and a response to the spells he actually casts.
Abilities

Heal
Calls upon Holy magic to heal an ally.
Interrupt Heal before it restores the king or observer. Keep an interrupter on Cho'Rush even when the group's damage is focused on Gordok.

Healing Wave
Calls upon Nature magic to heal an ally.
If Cho'Rush casts Healing Wave, give it the same interrupt priority as Heal rather than waiting for a different healer spell.

Power Word: Shield
Remove Power Word: Shield with an offensive magic dispel when available. Use an actual interrupt on healing casts rather than relying on damage to delay a shielded caster.

Psychic Scream
Lets out a psychic scream, causing up to 5 nearby enemies to flee for 4 seconds.
Keep players who do not need melee range away from Psychic Scream, and keep cleared space behind the player handling Cho'Rush.

Frost Nova
Inflicts Frost damage to nearby enemies, immobilizing them for up to 8 seconds.
Allow room to remain in healing range if Frost Nova roots the handler; do not separate Cho'Rush so far that a rooted player loses all support.
- Tank
- Assign a separate player to occupy Cho'Rush before pulling Gordok, with a clear path for healing and interrupts. Keep the observer out of the party's cleave when the plan is to preserve him.
- Healer
- Watch Cho'Rush's handler as well as Gordok's tank. Stay outside Psychic Scream's nearby area and keep the handler in reach if Frost Nova prevents repositioning.
- Damage
- Keep Heal and Healing Wave interrupted. A normal clear can defeat Cho'Rush first; on tribute, stop damage before killing him and avoid cleave or damage over time that would finish him while the group attacks Gordok.
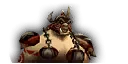
King Gordok
Elite HumanoidGordok combines Mortal Strike's healing reduction with armor loss and displacement while Cho'Rush can still heal the encounter.
Abilities
Mortal Strike
Inflicts 300% weapon damage and leaves the target wounded, reducing the effectiveness of any healing by 50% for 5 seconds.
Keep the tank healthy before Mortal Strike and use a defensive while the wound reduces healing effectiveness.
Sunder Armor
Sunder Armor increases the danger of subsequent Physical hits. Preserve a defensive response for its overlap with Mortal Strike.
Berserker Charge
Charges at an enemy, knocking it back and inflicting normal damage plus 300.
Stand where Berserker Charge cannot take Gordok into an uncleared side group, and give the tank room to recover him afterward.
War Stomp
Keep the healer outside War Stomp's nearby knockback and stun so healing continues while melee players are disabled.
- Tank
- Hold Gordok on cleared throne-room ground, away from the side groups and Cho'Rush's handler. Use a defensive when Mortal Strike overlaps accumulated armor loss, then recover Gordok after his charge.
- Healer
- Keep the tank healthy before Mortal Strike and stand outside War Stomp. Retain range to Cho'Rush's handler without standing beside an uncleared side group as a charge destination.
- Damage
- Keep the assigned Cho'Rush interrupter in place while focusing Gordok. For tribute, avoid attacks that also damage the observer; choose charge positions that leave Gordok's return path clear.