 Azeroth DB
Uldaman
Quests: level 36–40 · 10 players · Loch Modan 34.8, 85.5
Bring a group of up to 10 players to Uldaman when you want to combine the Badlands excavation quests with a full dungeon clear. The approach quests can be finished outside the instance; the deeper run includes Ironaya's staff puzzle and ends with Archaedas and his awakening statues.
Preparation
For Ironaya, have the same player collect Gni'kiv Medallion from Baelog's chest and The Shaft of Tsol from Revelosh. Combine them into Staff of Prehistoria and use it at the model city in the Map Chamber.
Agmond's Fate asks for four Carved Stone Urns from the dig outside Uldaman. Finish the collection before entering and return the urns to Prospector Ironband in Loch Modan.
Solution to Doom asks for the Tablet of Ryun'eh from an ancient chest in the exterior excavation. Collect it before crossing the instance portal, then return it to Theldurin the Lost.
Power Stones asks for eight Dentrium Power Stones and eight An'Alleum Power Stones for Rigglefuzz. Work on these while clearing the Shadowforge excavation outside the instance rather than expecting the final vault to complete the quest.
Indurium asks for ten Indurium Flakes from Stonevault troggs in the Badlands for Martek the Exiled. Complete this exterior objective before joining the dungeon run; it does not require reaching Archaedas.


Dig One
Clear the entrance passages and visit both Revelosh's position and the dwarves' camp before continuing to the Map Chamber. Keep the staff components on one player. Alliance can visit the friendly dwarves without fighting them; Horde must handle Baelog, Eric and Olaf together.
Creatures
- Stonevault OracleElite Humanoid
Stonevault Oracles can undo a pull's damage with Healing Wave. Interrupt that heal and remove Lightning Shield when possible instead of letting its charges punish repeated attacks.

Healing Wave

Lightning Shield
The caster is surrounded by 3 balls of lightning. When a spell, melee or ranged attack hits the caster, the attacker will be struck for 64 Nature damage. This expends one lightning ball. Only one ball will fire every few seconds. Lasts 10 minutes.
Revelosh
Elite HumanoidRevelosh tests whether the group can interrupt Chain Lightning without allowing its jumps to spread through tightly packed players.
Abilities

Chain Lightning
Strikes an enemy with a lightning bolt that arcs to another nearby enemy. The spell affects up to 3 targets, causing Nature damage to each.
Prioritize interrupting Chain Lightning and spread away from its first target so a completed cast cannot jump through the group.

Lightning Bolt
Blasts an enemy with lightning, inflicting Nature damage.
Interrupt Lightning Bolt when Chain Lightning is covered; Nature damage continues even when the tank has Revelosh in melee reach.
 Tank
Tank- Bring Revelosh into the cleared pull so players can reach his casts; leave enough separation from the healer that Chain Lightning does not jump straight from you to them.
 Healer
- Stand apart from the tank and other ranged players. If Chain Lightning completes, recover its struck targets before a following Lightning Bolt lands.
 Damage
- Assign the first Chain Lightning interrupt before the pull and use spare interrupts on Lightning Bolt. After the fight, leave The Shaft of Tsol with the player carrying Gni'kiv Medallion.

Horde fight Baelog, Eric and Olaf together, combining Baelog's ranged attacks with Eric's empowered opening and Olaf's tank stun; Alliance can pass the friendly dwarves without combat.
Abilities

Shoot
Shoots at an enemy, inflicting Physical damage.
Baelog uses Shoot. Pull around a corner to bring him into the group instead of leaving him firing from the camp.

Strike
Strikes at an enemy, inflicting increased melee damage.
Baelog's Strike adds melee pressure once he reaches the tank; keep him controlled while Olaf is being defeated.

Rushing Charge
Eric's Rushing Charge increases his movement speed and empowers his first attack. Let the tank receive that opening instead of starting damage as Eric arrives.

Shield Slam
Olaf's Shield Slam stuns its target. Focus Olaf to remove the stun while the other dwarves are still attacking.
- Tank
- Horde: draw Baelog around a corner so Shoot does not keep him apart from Eric and Olaf, then hold the trio through Olaf's Shield Slam. Alliance: leave the friendly camp undisturbed.
- Healer
- Horde: cover Eric's empowered opening and keep the tank healthy before Olaf's Shield Slam prevents them from acting. Alliance: this camp does not require a boss fight.
- Damage
- Horde: focus Olaf to end Shield Slam, keeping Eric and Baelog controlled rather than splitting damage across the trio. Alliance: take the chest component for Ironaya without attacking the dwarves.
Map Chamber
Use the assembled Staff of Prehistoria at the model city to open Ironaya's chamber. Gather in cleared space before activating it so her frontal smash and nearby stomp do not catch players still arriving through the passages.

Ironaya
Elite GiantIronaya turns the staff puzzle into a positioning fight around a frontal Arcing Smash and the nearby knockback and stun of War Stomp.
Abilities

Arcing Smash
Lashes out in a vicious arc, inflicting damage to enemies in a cone in front of the caster.
Point Arcing Smash away from the group; melee attack from behind Ironaya rather than sharing the tank's frontal cone.

War Stomp
War Stomp hits nearby players and can knock them back and stun them. Keep the healer out of melee and allow the tank to restore position after it lands.
- Tank
- Take Ironaya in the cleared chamber with Arcing Smash aimed away from the group. After War Stomp, return her to that facing before melee close in again.
- Healer
- Heal from outside Ironaya's melee group so War Stomp does not disable the tank and healer together; recover the tank after the stomp while they regain position.
- Damage
- Attack behind Ironaya to avoid Arcing Smash. Ranged players remain apart from her melee group, and melee wait for the tank to restore her facing after War Stomp.
Stonekeeper halls
Take the Obsidian Sentinel side chamber before continuing to Ancient Stone Keeper. Finish the Sentinel's shards before leaving its room, then use the Stone Keeper's chamber as moving space when sand storms appear.
Creatures
- Obsidian ShardMechanical
Obsidian Shards appear during the Sentinel fight. Collect and defeat them as they arrive so the healer does not inherit an increasing number of melee attackers.
Obsidian Sentinel
Elite MechanicalObsidian Sentinel becomes less dangerous itself as it splinters, but the accumulating Obsidian Shards make unattended adds the main threat.
Abilities

Summon Obsidian Shard
Collect each summoned Obsidian Shard and defeat it before returning to the Sentinel; leaving shards on the healer reverses the benefit of weakening the boss.

Splintered Obsidian
Splintered Obsidian reduces the Sentinel's physical damage. Keep removing shards instead of treating the weakened boss as permission to ignore them.
- Tank
- Gather the Obsidian Shards onto the Sentinel as they appear so damage can reach them without sending loose attackers through the healer's position.
- Healer
- Watch the player collecting the shards. The Sentinel's weakening melee does not reduce the separate damage from shards that have been left alive.
- Damage
- Switch to new Obsidian Shards before resuming the Sentinel. Finish the surviving shards before the group leaves this side chamber.
Ancient Stone Keeper
Elite ElementalAncient Stone Keeper tests whether the tank and healer can keep the fight moving around summoned sand storms.
Abilities

Sand Storms
Summons 1 Sand Storm to aid the caster in battle for 30 seconds.
Move the fight away from each summoned storm instead of keeping Ancient Stone Keeper planted beside the healer's casting position.
- Tank
- Lead Ancient Stone Keeper into clear space as storms reach the melee group, keeping a path that does not carry the boss through the healer.
- Healer
- Choose another clear casting position before a storm reaches you and keep line of sight to the moving tank instead of finishing casts inside the storm.
- Damage
- Follow the tank away from each sand storm. Leave the healer a clear position rather than circling the boss back through the space they just moved into.
Shadowforge and Stonevault camps
Clear Galgann Firehammer's Shadowforge camp before moving into Grimlok's cavern. Handle the Geologists before their fire overlaps Galgann's vulnerability effects. At Grimlok, separate the basilisk and spellcasters from the boss fight rather than allowing reflection, stuns and fire vulnerability to interfere with the lightning casts.
Creatures
- Shadowforge GeologistElite Humanoid
Shadowforge Geologists accompany Galgann. Interrupt Flame Spike and leave the area it burns; Flame Lash lowers Fire resistance and makes the rest of this pull's fire harder to survive.

Flame Spike

Flame Lash
- Stonevault GeomancerElite Humanoid
Stonevault Geomancers combine Fireball with Flame Buffet's increased Fire damage taken. Interrupt their fire casts and avoid bringing another Geomancer into a pull while that vulnerability is active.

Fireball
Inflicts Fire damage to an enemy.
Flame Buffet
- Jadespine BasiliskElite Beast
Control the Jadespine Basilisk before its Crystalline Slumber removes the tank from the fight. Spellcasters must stop harmful casts while Reflection is active instead of damaging themselves.

Crystalline Slumber
Stuns an enemy, rendering it unable to move or attack for 15 seconds.
Reflection
Gives the caster 100% chance to reflect harmful spells for 5 seconds.
Galgann Firehammer
Elite HumanoidGalgann Firehammer punishes overlapping Fire attacks while Amplify Flames and Flame Lash make their target more vulnerable to them.
Abilities

Fire Nova
Inflicts Fire damage to nearby enemies.
Fire Nova hits nearby players. Keep healers and ranged attackers outside the melee group so the nova does not damage everyone carrying a fire vulnerability.
Flame Lash
Flame Lash lowers Fire resistance. Remove its magic effect when possible before another Fire Nova or Geologist cast hits the same player.
Amplify Flames
Increases the Fire damage taken by an enemy by 100 for 30 seconds.
Dispel Amplify Flames from its victim before the next fire hit; it increases Fire damage taken rather than dealing damage by itself.

Flame Shock
Flame Shock leaves continuing Fire damage. Remove it when possible, especially while its target also has Amplify Flames or reduced Fire resistance.
- Tank
- Keep Galgann and his Geologists in the cleared camp while the guards are removed. Leave the healer outside Fire Nova's nearby damage rather than pulling Galgann onto their casting position.
- Healer
- Prioritize removing Amplify Flames and Flame Lash's resistance reduction. Heal Flame Shock's victim while remaining outside the melee group and clear Flame Spike's burning area before resuming casts.
- Damage
- Control or defeat the Shadowforge Geologists before concentrating on Galgann. Interrupt Flame Spike and give the healer time to remove fire vulnerability instead of taking avoidable Fire Nova hits.
Grimlok
<Stonevault Chieftain>Elite HumanoidGrimlok combines jumping lightning with Shrink's loss of Strength and Stamina while Bloodlust increases the pressure from whichever ally receives it.
Abilities
Chain Bolt
Interrupt Chain Bolt first and spread away from its target so the bolt cannot jump through a clustered group.
Lightning Bolt
Blasts an enemy with lightning, inflicting Nature damage.
Use spare interrupts on Lightning Bolt once Chain Bolt is covered; it continues Nature damage against Grimlok's target.

Bloodlust
Increases an ally's attack speed by 30% for 30 seconds.
Remove Bloodlust from the enemy receiving it when the group has an offensive magic dispel; its faster attacks matter while the tank is affected by Shrink.

Shrink
Remove Shrink with a curse-removal ability, prioritizing the tank. It reduces Strength and Stamina rather than being an ordinary magic debuff.

Tremor Totem
Summons a Tremor Totem with 5 health at the feet of the caster that shakes the ground around it, removing Fear, Charm and Sleep effects from party members within 30 yards. Lasts 5 minutes.
Destroy Tremor Totem before relying on Fear, Charm or Sleep to control Grimlok's companions; the totem removes those effects from its allies.
- Tank
- Keep Grimlok apart from the players handling the basilisk so Chain Bolt does not jump into them. Call for Shrink removal before its lost Stamina overlaps an enemy's Bloodlust attacks.
- Healer
- Check for Shrink on the tank and use curse removal if available; a magic dispel will not remove it. Stand apart from other players and recover Chain Bolt damage while the group handles the basilisk's stun.
- Damage
- Control the basilisk and Geomancer before committing to Grimlok, withholding harmful spells during the basilisk's Reflection. Cover Chain Bolt interrupts, remove enemy Bloodlust if able and destroy Tremor Totem before using the control effects it counters.
Archaedas's vault
Continue beyond Grimlok through the stone guardians to Archaedas's chamber. Gather everyone at the altar before activating the boss and decide who will collect the statues that awaken during combat. The run ends here after Archaedas falls.
Creatures
- Stone KeeperElite Elemental
Keep Stone Keepers away from the healer and ranged players while fighting through the final halls; Trample hits nearby enemies rather than only their current target.

Trample
- Earthen CustodianHumanoid
Earthen Custodians awaken during Archaedas's fight. Have the statue handler collect each one before healing draws it away from the boss group.
- Earthen GuardianHumanoid
Awakened Earthen Guardians use Whirlwind. Keep their fighting position away from the healer and let melee step away while they spin.

Whirlwind
- Vault WarderElite Elemental
Vault Warders join the final statue pressure with Trample. Collect them away from the ranged group so their nearby damage does not interrupt the group's recovery from earlier awakenings.
Trample
Archaedas
<Ancient Stone Watcher>Elite GiantArchaedas tests whether the group can collect successive awakened statues without letting Ground Tremor disable everyone supporting the tank.
Abilities

Ground Tremor
Stuns nearby enemies, rendering them unable to move or attack for 2 seconds.
Ground Tremor stuns nearby players. Keep healers and ranged attackers apart from the boss's melee group so the stun does not stop the whole group's response to newly awakened statues.
Awaken Earthen Dwarf
Pick up the Earthen Custodian as it awakens and remove it before returning to Archaedas; leaving early statues alive gives later awakenings more attackers to join.
Awaken Earthen Guardians
Gather the Earthen Guardians away from the healer and clear their wave. Melee step away during the guardians' Whirlwind rather than standing among the newly active statues.
Awaken Vault Warder
Have the statue handler collect the Vault Warders immediately. Keep their Trample away from the ranged group while the group finishes the awakened enemies and Archaedas.
- Tank
- Choose a statue handler before the altar is activated. Hold Archaedas while that player collects new Custodians, Guardians and Vault Warders; if you must handle both, bring the statues into your cleared fighting space rather than toward the healer.
- Healer
- Stay outside Archaedas's melee group to avoid Ground Tremor and watch the player collecting statues as each wave wakes. Keep clear of the Guardians' Whirlwind and Warders' Trample while maintaining line of sight to the boss tank.
- Damage
- Clear the early Earthen Custodians and switch to the Guardian wave when it wakes. Keep the statue handler free of accumulated enemies, step away from Whirlwind and follow the group's target when the Vault Warders join.
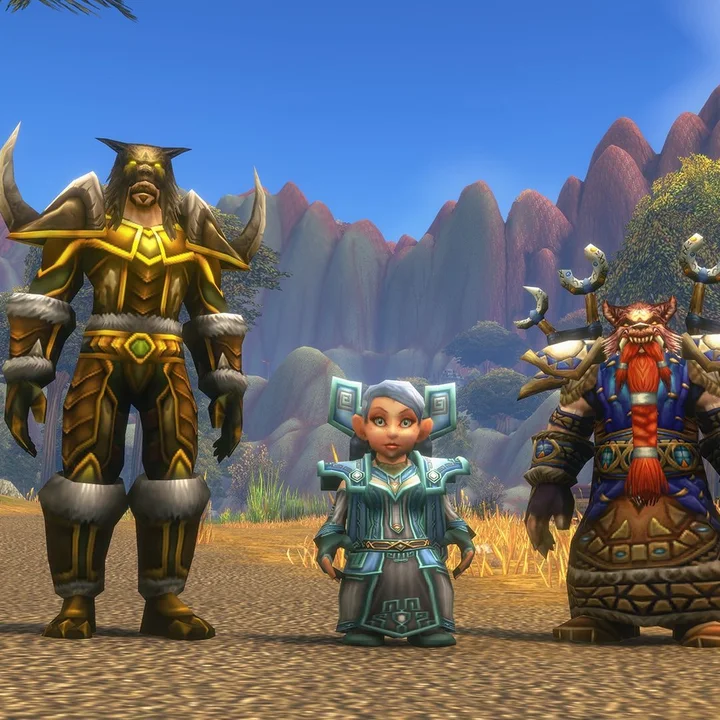 WoW Forever beta patch notes: October 1