 Azeroth DB
Blackrock Depths
5 players · Searing Gorge 27.1, 72.5
Groups can make a prison, arena or forge outing without committing to the Imperial Seat. Take the longer route when the Emperor is your objective: it passes through the Grim Guzzler, Summoners' Tomb and Lyceum, and ends with Emperor Dagran Thaurissan; defeat him before Moira if you want her to survive and speak afterward.
Preparation
Bring a Shadowforge Key if you intend to use the locked Shadowforge gates and the upper passage to West Garrison. Operate the Shadowforge Lock inside East Garrison to open that upper route.
Take the Prison Cell Key from High Interrogator Gerstahn before opening the Detention Block cells. It serves the prison doors, not the Shadowforge gates.
Collect Relic Coffer Keys for a Black Vault outing. Clear the room and gather the party before opening the last relic coffer, which starts the vault fight.
For the separate Dark Coffer, inspect the Dark Keeper Portrait inside the vault and find the keeper it identifies. That keeper's Dark Keeper Key opens the Dark Coffer; a Relic Coffer Key does not.
Buy Dark Iron Ale Mugs from Plugger Spazzring before provoking the bar if you want Private Rocknot's route through the rear exit. Give the ale to Rocknot and prepare for Phalanx at the door.
An Imperial Seat run needs the Shadowforge Torches carried by Shadowforge Flame Keepers in the Lyceum. Take the torches to the braziers to open the Iron Hall; they are collected inside the dungeon.


Detention Block and Halls of the Law
Start with the prison branch for Gerstahn and the cell key, or follow the halls toward the arena. Pull Gerstahn into cleared space before Psychic Scream can send players into another pack. Catch Roccor away from other patrols, and clear the hounds on the approach to Grebmar's den beneath the arena.
Creatures
- Anvilrage MedicElite Humanoid
Anvilrage Medics in the halls can heal themselves and nearby allies. Keep an interrupt for Prayer of Healing rather than letting a nearly finished pack recover.

Heal
Interrupt the Medic's self-heal before it undoes the group's focused damage.

Prayer of Healing
Stop Prayer of Healing while other dwarves are still alive.

Mind Blast
If healing casts are already covered, stop Mind Blast to reduce the pack's Shadow damage.
- BloodhoundDemon
Clear Bloodhounds before committing to Grebmar so his Bloodlust does not overlap a fresh hound pull. Keep Gerstahn's feared players away from any hounds left in the prison.

High Interrogator Gerstahn
<Twilight's Hammer Interrogator>Elite HumanoidGerstahn combines Psychic Scream with Mana Burn, so a prison pull can become a fear-driven extra pack while the healer loses mana.
Abilities

Psychic Scream
Lets out a psychic scream, causing up to 5 nearby enemies to flee for 6 seconds.
Fight beside cleared ground so feared players do not run into another prison group.

Mana Burn
Reserve an interrupt for Mana Burn, especially when it targets the healer.

Shadow Word: Pain
Utters a word of darkness, inflicting Shadow damage to an enemy every 3 sec. for 18 seconds.
Dispel Shadow Word: Pain rather than leaving its Shadow damage running through a fear.

Shadow Shield
Watch melee health while Shadow Shield returns damage to attackers; remove the shield if the group can dispel enemy magic.
 Tank
Tank- Bring Gerstahn into the cleared prison corridor before committing. Keep her there so Psychic Scream does not send the party toward untouched cells and patrols.
 Healer
- Dispel Shadow Word: Pain and keep enough health on the tank to cover a Psychic Scream. Warn the group if Mana Burn is targeting you so its interrupt takes priority.
 Damage
- Stop Mana Burn and keep the fear escape route clear of fresh enemies. Melee should watch the damage returned by Shadow Shield rather than continuing at low health.
Lord Roccor
Elite ElementalRoccor's patrol becomes dangerous when Ground Tremor interrupts the group's response to Earth Shock and Flame Shock.
Abilities

Ground Tremor
Stuns nearby enemies, rendering them unable to move or attack for 2 seconds.
Keep the healer and ranged attackers outside the nearby stun instead of placing the whole group beside Roccor.

Earth Shock
Shocks an enemy with concussive force, inflicting Nature damage and interrupting the spell being cast for 2 seconds.
Earth Shock interrupts the target's current spell; avoid relying on an exposed caster to complete the sole emergency heal.

Flame Shock
Instantly burns an enemy, then inflicts additional Fire damage every 3 sec. for 12 seconds.
Remove Flame Shock with a magic dispel if available while maintaining healing through the initial hit.
- Tank
- Intercept Roccor in a cleared section of the halls. Maintain a health margin for Ground Tremor rather than taking the patrol beside another pack.
- Healer
- Work outside Ground Tremor's nearby stun and remove Flame Shock when you can dispel magic. Account for Earth Shock interrupting a cast when choosing emergency healing.
- Damage
- Ranged attackers should stay outside Ground Tremor's reach. Finish Roccor in the cleared pull area instead of following his patrol into remaining enemies.
Houndmaster Grebmar
Elite HumanoidGrebmar's Bloodlust raises melee pressure while Pummel punishes a healer who stands within his reach.
Abilities

Demoralizing Shout
Demoralizing Shout reduces nearby melee attack power; avoid letting the weakened damage prolong his Bloodlust pressure.

Pummel
Pummels an enemy for 45 damage and interrupts the spell being cast for 5 seconds.
Keep healing casts outside Pummel's reach so the healer's spell school is not interrupted.

Bloodlust
Increases an ally's attack speed by 30% for 30 seconds.
Prepare tank mitigation when Bloodlust accelerates his attacks.
- Tank
- Clear the hound approach before pulling Grebmar. Keep defensive resources for Bloodlust rather than beginning his accelerated attacks with a fresh hound pack on you.
- Healer
- Heal from outside Pummel's reach and prepare for faster incoming melee attacks during Bloodlust.
- Damage
- Finish the hounds before engaging Grebmar, then focus him so Bloodlust and Demoralizing Shout do not turn the den into a prolonged fight.
Ring of Law and Shrine of Thaurissan
Gather everyone before entering the arena floor, which closes for the Ring of Law event. Deal with its preliminary attackers and then the chosen champion. After the arena, use the upper route toward the Shrine of Thaurissan without pulling the stands; Loregrain is on the shrine branch.
Ring of Law
Gorosh the DervishElite HumanoidGrizzleElite HumanoidEvisceratorElite HumanoidOk'thor the BreakerElite HumanoidAnub'shiahElite UndeadHedrum the CreeperElite BeastThe Ring of Law closes for preliminary attackers and a chosen champion whose melee, spell or poison mechanics determine the final fight.
Abilities

Whirlwind
Against Gorosh the Dervish, move melee attackers away during Whirlwind.

Mortal Strike
Inflicts 300% weapon damage and leaves the target wounded, reducing the effectiveness of any healing by 50% for 5 seconds.
Gorosh's Mortal Strike reduces healing on its victim; use mitigation rather than expecting the healer to erase the hit immediately.
Bloodlust
Increases an ally's attack speed by 30% for 30 seconds.
Prepare for Gorosh's faster swings under Bloodlust, particularly while Mortal Strike is active.
Ground Tremor
Stuns nearby enemies, rendering them unable to move or attack for 2 seconds.
Against Grizzle, keep the healer and ranged attackers outside Ground Tremor's nearby stun.

Cleave
Turn Grizzle's Cleave away from other melee attackers.
Enrage
Use tank defenses against Grizzle's Enrage instead of letting its faster, stronger attacks meet a depleted tank.

Anti-Magic Shield
Creates an anti-magic shell around the caster, giving it magic immunity for 10 seconds.
Against Eviscerator, stop offensive spells during Anti-Magic Shield and let physical attackers continue.

Vicious Rend
Inflicts Physical damage to an enemy every 3 sec. for 15 seconds.
Heal through Eviscerator's Vicious Rend; it is a Physical bleed rather than a magic effect to dispel.

Shadow Bolt Volley
Hurls missiles of dark magic, inflicting Shadow damage to nearby enemies.
Recover the group after Eviscerator's Shadow Bolt Volley while continuing to cover the bleeding tank.

Polymorph
Transforms an enemy into a sheep, forcing it to wander around for up to 20 seconds. While wandering, the sheep cannot attack or cast spells, but regenerates very quickly. Any damage will transform the target back into its normal form. Only one target can be polymorphed at a time. Only works on beasts, dragons, giants, humanoids, and critters.
Against Ok'thor the Breaker, dispel Polymorph promptly if it removes the tank or healer from the fight.

Arcane Explosion
Sends out a blast wave of magic, inflicting Arcane damage to nearby enemies.
Keep ranged attackers outside Ok'thor's nearby Arcane Explosion.

Arcane Bolt
Hurls a magical bolt at an enemy, inflicting Arcane damage.
Interrupt Ok'thor's Arcane Bolt when Polymorph handling is already covered.

Curse of Tongues
Forces nearby enemies to speak in Demonic, reducing their casting speed by 50% for 15 seconds. Only one curse per warlock can be active on any one target.
Against Anub'shiah, remove Curse of Tongues from the healer and other casters.

Enveloping Web
Immobilizes an enemy, increases the time between its attacks by 100%, and prevents it from casting spells for 8 seconds.
A player caught in Anub'shiah's Enveloping Web cannot cast; use defensive resources if it removes the healer's response.
Shadow Bolt
Hurls a bolt of dark magic at an enemy, inflicting Shadow damage.
Stop Anub'shiah's Shadow Bolt, especially while the healer is webbed or cursed.

Curse of Weakness
Remove Anub'shiah's Curse of Weakness from physical attackers when caster curses are already handled.

Baneful Poison
Against Hedrum the Creeper, keep ranged players away from the nearby poison and cleanse affected players.

Web
Casts a web over an enemy, immobilizing it for 10 seconds.
Position Hedrum away from the healer before Web can immobilize someone beside him.
- Tank
- Identify the champion before committing defenses. Turn Grizzle's Cleave away from the party, protect yourself during Gorosh's Mortal Strike and Bloodlust, and keep Hedrum away from the ranged group.
- Healer
- Gorosh's Mortal Strike reduces your healing, while Eviscerator adds a Physical bleed and group Shadow damage. Dispel Ok'thor's Polymorph, remove Anub'shiah's caster curses, and cleanse Hedrum's poison as the chosen opponent requires.
- Damage
- Leave Gorosh's Whirlwind and stop casting offensive spells into Eviscerator's Anti-Magic Shield. Against Ok'thor or Anub'shiah, use interrupts to protect the healer rather than treating every champion as a melee damage race.
Pyromancer Loregrain
Elite HumanoidLoregrain's Scorching Totem keeps attacking while Fire Ward absorbs the Fire damage used against him.
Abilities

Scorching Totem
Summons a Scorching Totem at the caster's feet. Totem lasts 35 seconds. and attacks a nearby enemy every 2 sec.
Destroy the summoned Scorching Totem or move the fight away from its attacks rather than ignoring it beside the healer.

Fire Ward
Surrounds the caster with a shield that lasts 1 minute. and can absorb a fixed amount of Fire damage.
Use a different damage school while Fire Ward absorbs Fire attacks.

Molten Blast
Burns an enemy, inflicting Fire damage.
Interrupt Molten Blast while the group is dealing with the totem's extra Fire damage.
Flame Shock
Instantly burns an enemy, then inflicts additional Fire damage every 3 sec. for 12 seconds.
Remove Flame Shock with a magic dispel when available.
- Tank
- Keep Loregrain in the cleared shrine area and move him away from a Scorching Totem if the group is not destroying it immediately.
- Healer
- Watch the Flame Shock victim and dispel it when possible. Avoid healing beside a Scorching Totem that the damage dealers have left alive.
- Damage
- Handle Scorching Totems before they prolong the shrine pull. Use non-Fire attacks into Fire Ward and interrupt Molten Blast.
Lower Shadowforge City
The lower circuit connects Incendius at the Black Anvil with the Hall of Crafting ramps and Black Vault balcony. Clear a section of Fineous's patrol before intercepting him. Finish Stilgiss and Verek before handling the coffers, and leave the final relic coffer closed until the group is ready for the vault guardians.
Creatures
- Fireguard DestroyerElite Elemental
Fireguard Destroyers threaten the whole pack with Fireball Volley. Separate their pulls and cover the volley instead of adding another fireguard while the group is injured.

Fireball Volley
Inflicts Fire damage to nearby enemies.
Interrupt Fireball Volley before nearby players take the Fire damage together.
- Warbringer ConstructElite Elemental
The vault's Warbringer Constructs activate when the relic-coffer event is completed. Prepare to pick them up before opening the final coffer rather than opening it while the healer is recovering.
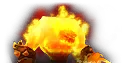
Lord Incendius
Elite ElementalIncendius tests control of the Black Anvil platform because Mighty Blow can turn a routine knockback into a fall while Fire Storm restricts safe ground.
Abilities

Fire Storm
Leave the burning area without moving toward the platform edge.

Fiery Burst
Inflicts Fire damage to all enemies in a selected area.
Recover affected players after Fiery Burst without bunching them into Fire Storm.

Mighty Blow
Keep solid platform behind the tank so Mighty Blow does not throw them into the lava.
- Tank
- Hold Incendius on the platform's interior with solid ground behind you. Reposition around Fire Storm without giving Mighty Blow a path to the edge.
- Healer
- Keep the tank healthy for Mighty Blow and stay on the platform's interior yourself. Move out of Fire Storm before resuming a stationary heal.
- Damage
- Follow Incendius around the interior rather than finishing a cast in Fire Storm or beside the edge. Leave room for the tank's knockback recovery.

Stilgiss can root the party while Verek uses extra attacks against a victim weakened by Curse of Blood.
Abilities

Frost Nova
Inflicts Frost damage to nearby enemies, immobilizing them for up to 8 seconds.
Keep ranged players away from Stilgiss so Frost Nova does not immobilize the whole group.

Frostbolt
Inflicts Frost damage to an enemy and reduces its movement speed for 4 seconds.
Interrupt Stilgiss's Frostbolt while controlling Verek.

Frost Armor
Account for Frost Armor slowing melee attackers instead of chasing Stilgiss through more enemies.

Frost Ward
Surrounds the caster with a shield that lasts 1 minute. and can absorb a fixed amount of Frost damage.
Use non-Frost damage while Stilgiss's Frost Ward is active.

Curse of Blood
Remove Verek's Curse of Blood before his Physical attacks exploit the increased damage taken.

Thrash
Gives the caster 2 extra attacks.
Prepare for Verek's extra attacks, especially if Curse of Blood remains on the tank.
- Tank
- Establish threat on Verek before Frost Nova can pin you in place. Keep him off the healer while a damage dealer covers Stilgiss's Frostbolt.
- Healer
- Prioritize Curse of Blood removal if you can remove curses, or call for it. Verek's Thrash can turn that increased Physical damage into a sudden tank-health drop.
- Damage
- Focus Verek while maintaining an interrupt on Stilgiss, then finish the caster. Frost attackers should change schools during Frost Ward rather than spending attacks into its absorption.
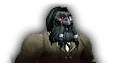
Fineous Darkvire
<Chief Architect>Elite HumanoidFineous patrols the crafting ramps and can undo the group's damage with Holy Light if his healing is left uninterrupted.
Abilities

Holy Light
Calls upon Holy magic to heal an ally.
Reserve an interrupt for Holy Light instead of allowing Fineous to recover during the ramp fight.

Kick
Keep the healer beyond Kick's reach to avoid losing a healing school.

Holy Strike
Keep a health margin for the empowered Holy Strike rather than judging incoming damage only by ordinary swings.

Seal of Reckoning
Surrounds an ally with a seal that lasts 30 seconds. Every time the sealed character strikes an enemy, the sealed character gains health.
Remove Seal of Reckoning with enemy-magic removal if available so successful attacks stop restoring his health.
- Tank
- Intercept Fineous at a cleared end of his patrol rather than following him through the workshop. Keep defensive resources for Holy Strike while the group stops Holy Light.
- Healer
- Heal outside Kick's reach and keep the tank above the danger from an empowered Holy Strike. Do not follow Fineous into an uncleared ramp pack to maintain range.
- Damage
- Assign Holy Light interrupts before the pull. Remove Seal of Reckoning if you can dispel enemy magic, and keep the fight on the cleared ramp.
Opening the final relic coffer activates the vault guardians and brings Doomgrip, whose healing prolongs a fight made harder by Sunder Armor.
Abilities

Sunder Armor
Prepare tank mitigation as Doomgrip's Sunder Armor increases the danger of the remaining Physical attacks.

Drink Healing Potion
Uses a Holy elixir to heal the caster.
Keep pressure on Doomgrip after Drink Healing Potion restores his health; do not leave the fight to open or loot another coffer.
- Tank
- Be ready beside the last coffer to collect the activating Warbringer Constructs before the healer draws them. Use mitigation when Doomgrip's Sunder Armor weakens your armor.
- Healer
- Recover before the final coffer is opened and prepare for the constructs' activation. Expect the tank's Physical damage intake to rise under Sunder Armor.
- Damage
- Stop coffer interactions when the guardians activate and finish the fight in the cleared vault. Continue focused damage when Doomgrip heals himself instead of assuming he is already defeated.
Dark Iron Highway and West Garrison
Bael'Gar is the spur at the far end of Dark Iron Highway. For the upper-city route, operate the Shadowforge Lock in East Garrison and continue to West Garrison. The left descending stairs lead to Angerforge; the other branch leads into the Manufactory. Clear the soldiers and their Medics before pulling Angerforge back toward the cleared landing.
Creatures
- Anvilrage MedicElite Humanoid
Separate the garrison's Medics from the boss pull. A Prayer of Healing cast can restore the dwarves you have already weakened while Angerforge's armor reduction increases tank damage.
Heal
Stop a Medic healing itself instead of splitting damage among healthy dwarves.
Prayer of Healing
Keep Prayer of Healing interrupted while finishing the garrison pack.
Bael'Gar
Elite GiantBael'Gar's summoned fire creatures split the group's attention and damage players in the area where they appear.
Abilities

Summon Spawn of Bael'Gar
Collect and defeat the creatures created by Summon Spawn of Bael'Gar, and avoid standing in their summoning area.
- Tank
- Use cleared space on Dark Iron Highway so you can collect Bael'Gar's summons without crossing another pack. Pick them up before the healer draws them away from you.
- Healer
- Expect extra Fire damage when Summon Spawn of Bael'Gar creates enemies. Stay within the tank's cleared pickup area while they gather the new creatures.
- Damage
- Switch from Bael'Gar to the creatures his summon creates, then return to the boss. Keep out of the summoning area rather than clustering on the arrival point.
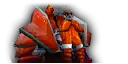
General Angerforge
Elite HumanoidAngerforge's Sunder Armor makes a prolonged fight harder to heal while his reinforcements require control at the pull point.
Abilities
Sunder Armor
Use tank mitigation as Sunder Armor builds rather than waiting for the healer to recover every increasingly large Physical hit.
- Tank
- Pull Angerforge back toward the cleared upper landing. Gather his reinforcements there and use mitigation as Sunder Armor weakens your armor.
- Healer
- Plan for increasing Physical damage under Sunder Armor. Stay in sight of the cleared landing so the tank does not have to bring reinforcements through more garrison enemies to reach you.
- Damage
- Deal with incoming reinforcements at the landing instead of chasing targets into the garrison. Keep pressure on Angerforge so Sunder Armor does not turn the fight into an extended healing drain.
The Manufactory
Clear the workshop before approaching Argelmach's rear room. Bring golem pulls back into the cleared entrance rather than fighting beside another workshop pack. Establish control of Argelmach's accompanying constructs before spreading out for Chain Lightning; the workshop's eastern route continues to the Grim Guzzler.
Creatures
- Ragereaver GolemElite Elemental
A Ragereaver Golem's melee critical hit can trigger Flurry. Finish the active golem before adding another one so the tank does not take overlapping accelerated attacks.
Flurry
Increases your attack speed by 30% for your next 3 swings after dealing a critical strike.
Use tank mitigation when Flurry accelerates the golem's following swings.
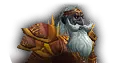
Golem Lord Argelmach
Elite HumanoidArgelmach combines Chain Lightning that grows stronger as it jumps with a Lightning Shield that punishes attackers.
Abilities

Chain Lightning
Strikes an enemy with a lightning bolt that arcs to another nearby enemy. The spell affects up to 5 targets, inflicting greater Nature damage to each successive target.
Spread out and interrupt Chain Lightning before it jumps into progressively stronger hits.

Lightning Shield
Remove Lightning Shield with enemy-magic removal if available; its retaliation can hit ranged attackers as well as melee.

Shock
Instantly throws a bolt of lightning at an enemy, inflicting Nature damage.
Keep the current victim healthy for Shock while the group is already taking lightning damage.
- Tank
- Clear the workshop before pulling Argelmach and establish control of his accompanying constructs. Leave enough room for the party to separate for Chain Lightning.
- Healer
- Stand apart from other casters so Chain Lightning cannot use the ranged group as successive jump targets. Watch attackers who take Lightning Shield retaliation as well as the tank.
- Damage
- Assign a Chain Lightning interrupt and spread out. Remove Lightning Shield if you can dispel enemy magic, and finish the accompanying constructs without clustering the whole party beside Argelmach.
The Grim Guzzler
Keep Plugger friendly long enough to buy any ale needed for Rocknot. Break the Thunderbrew Lager Kegs for Hurley, or threaten Ribbly through conversation for his fight; prepare each pull separately. Rocknot's ale event brings Phalanx to the rear exit. Fighting Plugger risks the surrounding customers, so clear the intended fighting space and keep incidental attacks off the bar floor.
Creatures
- Blackbreath CronyElite Humanoid
Blackbreath Cronies arrive with Hurley after the kegs are broken. Collect the whole keg-room pull before the healer casts, and keep its fighting area inside the storage alcove.
- Ribbly's CronyElite Humanoid
Ribbly's Cronies join the conversation-triggered fight. Establish control of them before Ribbly's Gouge can interrupt the tank, without spreading area attacks into neutral customers.
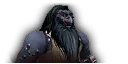
Hurley Blackbreath
Elite HumanoidBreaking the lager kegs brings Hurley and his cronies into a cramped fight where Flame Breath and Drunken Rage make positioning matter.
Abilities
Flame Breath
Aim Flame Breath into the cleared alcove wall rather than through the healer or other attackers.
Drunken Rage
Increases the caster's attack speed by 50% and increases the Physical damage it deals by 50 for 15 seconds.
Prepare mitigation for Drunken Rage's faster and stronger Physical attacks.
- Tank
- Collect Hurley and his cronies inside the keg-room alcove. Turn Flame Breath away from the party and use defenses for Drunken Rage instead of backing into the customers.
- Healer
- Stay outside Hurley's frontal Flame Breath and prepare the tank for Drunken Rage. Keep the alcove doorway clear so you do not draw the pull into the bar.
- Damage
- Keep attacks inside the keg room and stay out of Flame Breath. Control the cronies without sending area damage into neutral drinkers outside the alcove.
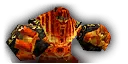
Phalanx
Elite ElementalPhalanx turns the tavern's rear exit into a knockback fight with group damage from Fireball Volley.
Abilities
Mighty Blow
Place the tank's back against the exit corner so Mighty Blow does not push the fight into customers.
Fireball Volley
Inflicts Fire damage to nearby enemies.
Recover nearby party members after Fireball Volley rather than healing only the tank.

Thunderclap
Keep ranged attackers and the healer beyond the nearby Thunderclap instead of accepting its damage and slows together.
- Tank
- Hold Phalanx in the rear-exit corner with your back protected from Mighty Blow. Recover his position there instead of dragging him through the bar.
- Healer
- Heal the party after Fireball Volley from outside Thunderclap's nearby area. Remain in sight of the tank's protected corner through the knockback.
- Damage
- Ranged attackers should avoid Thunderclap's area. Keep incidental attacks off customers if Mighty Blow changes the tank's position.

Ribbly Screwspigot
Elite HumanoidRibbly brings his cronies into a conversation-triggered fight and uses Gouge and Hamstring to disrupt control inside the bar.
Abilities
Gouge
Inflicts 20 damage to an enemy and stuns it for up to 4 seconds. You will automatically stop attacking. Target must be facing you. Any damage received by the stunned target will revive it.
Establish control of the cronies before Gouge stuns the tank; avoid retreating through other customers if Ribbly changes targets.

Hamstring
Choose the fighting space before Hamstring slows the tank instead of trying to relocate through the occupied bar afterward.
- Tank
- Establish threat on Ribbly and his cronies before Gouge can stun you. Use the cleared alcove rather than relying on movement once Hamstring is active.
- Healer
- Remain in sight of the alcove and keep the stunned Gouge victim covered. If Ribbly reaches you, return toward the tank rather than escaping through neutral customers.
- Damage
- Focus Ribbly before cleaning up his cronies. Confine control and area attacks to the alcove so Gouge does not turn a contained pull into a bar-wide fight.

Plugger Spazzring
Elite HumanoidProvoking Plugger risks the bar's customers while Immolate and Curse of Tongues put sustained pressure on the group's casters.
Abilities
Shadow Bolt
Hurls a bolt of dark magic at an enemy, inflicting Shadow damage.
Stay in the healer's line of sight through Shadow Bolt casts rather than retreating past additional patrons.

Immolate
Burns an enemy, then inflicts additional Fire damage every 3 sec. for 21 seconds.
Dispel Immolate to stop its continuing Fire damage.
Curse of Tongues
Forces an enemy to speak in Demonic, reducing its casting speed by 50% for 15 seconds. Only one curse per warlock can be active on any one target.
Remove Curse of Tongues from the healer before its slower casting prevents recovery.

Demon Armor
Use enemy-magic removal on Demon Armor if available rather than repeatedly committing physical burst into its added armor.
- Tank
- Prepare a cleared fighting corner before making Plugger hostile. Hold the fight there rather than chasing him or additional customers across the occupied tavern.
- Healer
- Dispel Immolate and call for Curse of Tongues removal if you cannot remove curses yourself. Keep healing sightlines inside the prepared corner.
- Damage
- Confine attacks to the prepared pull. Remove Curse of Tongues from casters and Demon Armor from Plugger when your abilities allow it; do not spread damage into more customers.
Chamber of Enchantment
Beyond the tavern's rear exit, take the doorway toward the Chamber of Enchantment rather than dropping from the balcony back into Shadowforge City. Clear Flamelash's room so damage dealers can intercept approaching summons without pulling another pack.
Creatures
- Fireguard DestroyerElite Elemental
Finish the Fireguard Destroyers on this approach before starting Flamelash. Their Fireball Volley competes with the healing needed once his summons begin reaching him.
Fireball Volley
Inflicts Fire damage to nearby enemies.
Stop Fireball Volley and recover before moving into Flamelash's room.
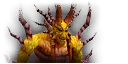
Ambassador Flamelash
Elite HumanoidA summon that reaches Flamelash grants Burning Spirit, turning a missed interception into greater damage from the boss.
Abilities
Burning Spirit
Increases the damage dealt by the caster by 30 for 3 minutes.
Defeat approaching summons before they reach Flamelash and grant the Burning Spirit damage increase.
- Tank
- Hold Flamelash near the room's center so damage dealers have space to intercept approaching summons. Keep mitigation for a failed interception that grants Burning Spirit.
- Healer
- Watch for Burning Spirit increasing Flamelash's damage after a summon reaches him. Preserve emergency healing for that increase rather than assuming his opening damage remains constant.
- Damage
- Intercept the approaching summons before they reach Flamelash. Do not continue a boss damage race while a summon is about to grant Burning Spirit.
Summoners' Tomb
Continue past the Mold Foundry to the tomb. Recover before speaking to Doom'rel, which starts the successive spirit fights. Keep watching for another active dwarf while finishing the current one, and stop Vile'rel's healing if spirits overlap. Completing the event opens the onward route to the Lyceum.
The Seven
Anger'relElite UndeadVile'relElite UndeadGloom'relElite UndeadDoom'relElite UndeadDope'relElite UndeadThe Seven tests control of overlapping dwarf spirits while Vile'rel heals and Gloom'rel reduces the healing received by their victim.
Abilities

Shield Wall
Reduces the Physical and magical damage taken by the caster by 75% for 10 seconds.
Anger'rel's Shield Wall reduces incoming damage; avoid spending damage cooldowns into it while another spirit needs attention.
Sunder Armor
Prepare for heavier Physical hits while Anger'rel's Sunder Armor remains on the tank.
Heal
Calls upon Holy magic to heal an ally.
Interrupt Vile'rel's Heal instead of allowing an active spirit to recover.
Prayer of Healing
Invokes Holy magic to heal nearby party members.
Give Vile'rel's Prayer of Healing priority when spirits overlap.

Power Word: Shield
Remove Vile'rel's Power Word: Shield with enemy-magic removal if available; do not rely on ordinary weapon hits to delay a protected caster's healing.
Mortal Strike
Inflicts 130% weapon damage and leaves the target wounded, reducing the effectiveness of any healing by 50% for 5 seconds.
Use mitigation against Gloom'rel's Mortal Strike because healing on its victim is reduced.
Cleave
Keep Gloom'rel's Cleave directed away from the rest of the party.
Gouge
Inflicts 20 damage to an enemy and stuns it for up to 4 seconds. You will automatically stop attacking. Target must be facing you. Any damage received by the stunned target will revive it.
Dope'rel's Gouge can stun the tank; establish threat on overlapping spirits before that loss of control.

Backstab
Face Dope'rel so Backstab cannot exploit your back while you collect another spirit.

Rupture
Inflicts Physical damage to an enemy every 2 sec. for 10 seconds.
Continue healing a victim of Dope'rel's Rupture after attention shifts to another spirit.

Evasion
Increases the rogue's chance to dodge by 50% for 15 seconds.
If another spirit is active, physical attackers can change targets during Dope'rel's Evasion instead of wasting attacks into its increased dodge.
Shadow Bolt Volley
Hurls missiles of dark magic, inflicting Shadow damage to nearby enemies.
Recover the group after Doom'rel's Shadow Bolt Volley while keeping the tank covered.
Immolate
Burns an enemy, then inflicts additional Fire damage every 3 sec. for 21 seconds.
Dispel Doom'rel's Immolate so its continuing Fire damage does not carry into the next overlap.
Curse of Weakness
Remove Doom'rel's Curse of Weakness from physical attackers when urgent healing is covered.
- Tank
- Watch for another active dwarf while finishing the current one. Keep Gloom'rel's Cleave off the party and face Dope'rel rather than exposing your back while collecting an overlap.
- Healer
- Keep a health margin for Gloom'rel's Mortal Strike, which reduces your recovery on its victim. Heal through Dope'rel's Rupture and recover the group after Doom'rel's volley; dispel Immolate when possible.
- Damage
- Reserve interrupts for Vile'rel's Heal and Prayer of Healing. If spirits overlap, direct burst away from Anger'rel's Shield Wall and let physical attackers leave Dope'rel during Evasion.
Lyceum and Iron Hall
In the Lyceum, find the Shadowforge Flame Keepers and take their Shadowforge Torches to the braziers. Clear the path the group needs rather than chasing isolated dwarves away from the torches. Light both braziers to enter the Iron Hall, then defeat Magmus for access to the Imperial Seat.
Creatures
- Shadowforge Flame KeeperHumanoid
Shadowforge Flame Keepers carry the torches needed for the braziers. Their Hamstring can leave the torch carrier behind the group, while Battle Shout strengthens the surrounding dwarves.
Hamstring
Keep the group with a hamstrung torch carrier rather than moving on without them.

Battle Shout
Finish the Flame Keeper before nearby dwarves gain a prolonged opportunity to attack under Battle Shout.
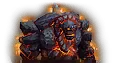
Magmus
Elite GiantMagmus can leave nearby players stunned and knocked back with War Stomp while Fiery Burst adds damage before the throne room.
Abilities

War Stomp
Keep the healer and ranged attackers outside the nearby War Stomp, and leave the tank room to recover from its knockback.
Fiery Burst
Inflicts Fire damage to all enemies in a selected area.
Heal affected players after Fiery Burst without moving the healer into War Stomp's nearby area.
- Tank
- Keep space behind you for War Stomp's knockback inside the cleared Iron Hall. Maintain enough health to survive while its stun prevents a response.
- Healer
- Work outside War Stomp's nearby stun and recover the party after Fiery Burst. Keep the tank healthy enough to cover the period when they cannot act.
- Damage
- Ranged attackers should remain beyond War Stomp. Melee attackers should account for its stun and knockback instead of moving the fight back toward the Lyceum.
The Imperial Seat
Clear the throne-room guards before engaging the Emperor. Moira fights alongside the Emperor. Assign someone to stop Moira's healing, keep incidental damage off her, and defeat the Emperor first if you intend to speak to her afterward.
Creatures
- Anvilrage CaptainElite Humanoid
Remove the Anvilrage Captains before the throne pull. Surviving guards join the Emperor, adding targets while Moira is healing him and Avatar of Flame is increasing tank damage.
- Doomforge DragoonElite Humanoid
Clear Doomforge Dragoons on the throne approach before committing to Moira and the Emperor. Bringing the guards into that fight makes it harder to keep attacks off Moira.

Princess Moira Bronzebeard
<Princess of Ironforge>Elite HumanoidMoira heals the Emperor during their shared fight, so sparing her requires healing interruption and controlled damage rather than killing her first.
Abilities
Heal
Calls upon Holy magic to heal an ally.
Interrupt Heal while leaving Moira alive if the group intends to speak to her after the Emperor dies.

Renew
Remove Renew from the Emperor with enemy-magic removal if available.
Mind Blast
Inflicts Shadow damage to an enemy, but causes a high amount of threat.
Account for Mind Blast's Shadow damage without spending every interrupt needed for Heal.
Shadow Bolt
Hurls a bolt of dark magic at an enemy, inflicting Shadow damage.
Keep an interrupt available for Moira's healing even when she is casting Shadow Bolt.
Shadow Word: Pain
Utters a word of darkness, inflicting Shadow damage to an enemy every 3 sec. for 18 seconds.
Dispel Shadow Word: Pain so its continuing damage does not distract from the Emperor's dangerous attacks.
- Tank
- Keep Moira controlled without exposing her to the attacks aimed at the Emperor. Preserve a clear position for the player assigned to interrupt Heal.
- Healer
- Keep Moira's assigned interrupt player healthy as well as the Emperor's tank. Dispel Shadow Word: Pain when possible rather than leaving it running through the Emperor's stun.
- Damage
- Use single-target damage on the Emperor and stop Moira's Heal. Remove Renew from him if possible, and keep cleaves and damage-over-time effects off Moira when she is to be spared.
Emperor Dagran Thaurissan
Elite HumanoidThe Emperor combines Avatar of Flame's magic immunity and added attack damage with Hand of Thaurissan's stun while Moira tries to heal him.
Abilities

Avatar of Flame
Stop offensive magic against the Emperor during Avatar of Flame; physical attackers can continue while casters help stop Moira's healing.

Hand of Thaurissan
Inflicts Fire damage to an enemy, stunning it for 5 seconds.
Keep the current victim healthy for Hand of Thaurissan's Fire damage and stun rather than relying on them to use a defense after it lands.
- Tank
- Save defensive resources for Avatar of Flame's added Fire damage and keep a health margin for Hand of Thaurissan. Hold the fight away from Moira's interrupt player rather than forcing them to chase her.
- Healer
- Increase tank coverage during Avatar of Flame and keep the victim of Hand of Thaurissan alive through the stun. Watch Moira's interrupt player so her healing does not prolong the Emperor's dangerous periods.
- Damage
- Physical attackers should keep pressure on the Emperor during Avatar of Flame. Casters should stop offensive magic into the immunity and help interrupt Moira without killing her if she is being spared.