 Azeroth DB
Maraudon
10 players · Desolace 29.1, 62.9
Maraudon takes groups of up to 10 into the caverns beneath Desolace. A full clear joins the orange and purple entrance wings at Celebras, then descends through Earth Song Falls to Princess Theradras in Zaetar's Grave. Returning groups carrying the Scepter of Celebras can start at the falls instead of repeating the entrance wings.
Preparation
For an inner-cavern run, bring the Scepter of Celebras and use its portal to Earth Song Falls. Take the colored entrances instead if the group wants Noxxion, Razorlash, Lord Vyletongue or Celebras the Cursed, since the shortcut bypasses them.

Orange Wing
Take the orange entrance for Noxxion's slime pools and the plant-filled route to Razorlash. Pull onto cleared ground rather than advancing through lingering clouds. If the group wants both entrance wings, return through the cleared tunnels and outer caves for the purple entrance before descending beyond Celebras.
Creatures
- Noxious SlimeElite Not specified
Pull Noxious Slimes away from the next pack. Move out of Noxious Cloud and let the group leave the cloud behind before advancing.

Noxious Cloud
Leave the cloud rather than keeping the tank and melee inside its repeated Nature damage.
Noxxion
Elite ElementalNoxxion alternates poison pressure with a split into summons, testing whether the group can regroup after Uppercut and switch targets together.
Abilities

Toxic Volley
Inflicts Nature damage to an enemy.
Recover the players hit by Toxic Volley before the next split draws healing attention away from them.

Uppercut
Inflicts normal damage plus 50 to an enemy, knocking it back.
Keep cleared ground behind the tank so Uppercut does not knock them toward another pull.
Summon Noxxion's Spawns
When Noxxion splits, gather and defeat the summons before returning damage to his reformed body.
 Tank
Tank- Leave cleared space behind you for Uppercut. When Noxxion splits, collect the summons before they spread toward the healer.
 Healer
- Recover Toxic Volley damage across the group, then watch the tank's range after Uppercut. When the summons appear, move toward the tank rather than drawing them down another passage.
 Damage
- Switch from Noxxion to the gathered summons during the split and use area damage once the tank has collected them. Return to Noxxion when he reforms.
Razorlash
Elite Not specifiedRazorlash combines Cleave with Puncture, concentrating direct hits and a continuing bleed on the tank while nearby allies risk sharing the cleave.
Abilities

Cleave
Keep other players away from the tank's position so Cleave does not catch nearby allies.

Puncture
Inflicts Physical damage to an enemy every 2 sec. for 10 seconds.
Continue tank healing between swings; Puncture keeps dealing Physical damage after it lands.
- Tank
- Hold Razorlash with the rest of the group away from your position. Keep him still so melee can remain behind him instead of moving beside you into Cleave.
- Healer
- Treat Puncture as continuing tank damage, including the gaps between Razorlash's swings. Avoid standing beside the tank while healing it.
- Damage
- Attack from behind Razorlash and give the tank space for Cleave. Finish the nearby plant pulls before engaging so a reposition does not join them to the bleed-heavy fight.
Purple Wing
Take the purple entrance through the satyr passages to Lord Vyletongue. Keep the pull in the cleared corridor: visible satyrs do not reveal where the stealthed Shadowstalkers are. Expose and collect Vyletongue's guards before committing damage to the boss, then follow the connecting passage toward Celebras.
Creatures
- Putridus ShadowstalkerElite Demon
Putridus Shadowstalkers approach in stealth. Keep the healer behind the tank in cleared space and check the sides of a pull before treating a visible satyr as an isolated enemy.

Sneak
Puts the caster in stealth mode, but slows its movement by 50%. Lasts until cancelled.
Sneak conceals the Shadowstalker; the tank should collect it when it appears instead of letting it reach the healer.

Putrid Breath
Putrid Breath reduces Agility and Spirit. Finish an exposed Shadowstalker rather than carrying it into another satyr pull.

Lord Vyletongue
Elite DemonVyletongue combines stealthed guards with Blink, a nearby Smoke Bomb stun and Multi-Shot, making a crowded pull difficult to recover.
Abilities

Blink
Teleports the caster 20 yd. forward unless something is in the way. Also frees the caster from any bonds.
Follow Vyletongue's Blink without running past the cleared pull area; give the tank time to reconnect before resuming heavy damage.

Smoke Bomb
Casts a smoke bomb, stunning nearby enemies for 4 seconds.
The healer should stay away from Vyletongue's immediate position so Smoke Bomb does not stun them alongside the tank.

Multi-Shot
Spread out so Multi-Shot does not find the group clustered around its target.

Shoot
Shoots at an enemy, inflicting Physical damage.
Keep Vyletongue's gunfire target within healing range while the tank catches up after Blink.
- Tank
- Collect the stealthed Shadowstalkers before the group commits to Vyletongue. Keep the fight in the cleared passage and reconnect with him after Blink rather than chasing into another satyr group.
- Healer
- Stand away from Smoke Bomb's nearby stun and keep the tank healthy before it lands. Recover Multi-Shot damage without following the tank into Vyletongue's immediate position.
- Damage
- Finish the exposed Shadowstalkers before concentrating on Vyletongue. Spread for Multi-Shot and pause heavy damage after Blink until the tank reaches him again.
Celebras' Grove
The entrance routes meet on the approach to Celebras the Cursed. Finish the surrounding pulls before engaging him so his summons remain separate from the passage's enemies. After the fight, regroup above the waterfall and agree on the landing before descending into Earth Song Falls; the drop separates the group from the upper route.

Celebras the Cursed
Elite HumanoidCelebras layers Entangling Roots over Twisted Tranquility while summoning attackers, testing whether the group can free trapped players and keep Wrath interrupted.
Abilities

Entangling Roots
Entangles an enemy in roots, inflicting Nature damage every 3 sec. and immobilizing it for up to 10 seconds.
Remove Entangling Roots when it traps a player in Twisted Tranquility, then move that player out of the damaging area.

Twisted Tranquility
Deals nature damage to enemies in an area over 10 seconds, slowing their movement by 70% and increasing the time between their attacks by 300%.
Leave Twisted Tranquility's area to avoid its Nature damage and movement and attack slowing.

Wrath
Hurls a bolt of lightning at an enemy, inflicting Nature damage.
Assign interrupts to Wrath so its Nature damage does not compete with healing players caught in roots or Tranquility.

Corrupt Forces of Nature
Summons 3 Forces of Nature to aid the caster in battle for 1 minute.
Collect the attackers summoned by Corrupt Forces of Nature and defeat them while a player continues covering Wrath interrupts.
- Tank
- Collect the Corrupt Forces of Nature summons before they reach the healer. Reposition Celebras out of Twisted Tranquility rather than keeping the melee group slowed inside it.
- Healer
- Free rooted players who cannot leave Twisted Tranquility, or call for another player's root removal if yours is unavailable. Watch the tank as the summons arrive instead of spending every cast on Wrath damage.
- Damage
- Keep Wrath interrupts assigned while switching to the summons from Corrupt Forces of Nature. Leave Twisted Tranquility and call out roots that prevent you from moving.
Earth Song Falls
The waterfall descent and the Scepter portal lead into the inner caverns. Take the side passages for Tinkerer Gizlock and Landslide before committing to the final lake. Keep pulls on the cleared ledges, and leave enough room behind the tank to recover from Landslide's knockback without falling away from the group.
Creatures
- Theradrim GuardianElite Elemental
A Theradrim Guardian can bring Theradrim Shardlings into its pull. Keep the shardlings with the tank and finish the whole pack before moving into another patrol; Knockdown can also stun players standing beside the tank.

Summon Theradrim Shardling
Gather the summoned shardlings on cleared ground so area damage does not reach another patrol.

Knockdown
Keep the healer away from the tank's position so Knockdown does not stop both tank control and healing together.
- Subterranean DiemetradonElite Beast
Subterranean Diemetradons silence nearby players with Sonic Burst. Have the tank hold them away from the healer and ranged casters instead of pulling the beasts onto the group.

Sonic Burst
Establish casting distance before Sonic Burst; a healer caught beside the beasts cannot cast through its silence.
Tinkerer Gizlock
Elite HumanoidGizlock makes the group separate his frontal Goblin Dragon Gun from Bomb targets while keeping beast pets from fleeing into uncleared tunnels.
Abilities

Goblin Dragon Gun
Keep the tank alone in Gizlock's front and move everyone else out of the Dragon Gun cone.

Bomb
Bombs all enemies in a selected area, inflicting Fire damage.
Spread out and leave the bombed area rather than sharing the Fire damage in one cluster.

Flash Bomb
Causes all Beasts in a 5 yard radius to run away for 10 seconds.
Flash Bomb frightens beasts. Keep beast pets' surroundings clear so a fleeing pet does not run into another pack.
Shoot
Shoots at an enemy, inflicting Physical damage.
Distance from the Dragon Gun does not prevent Shoot damage; stay within the healer's reach while spreading for Bomb.
- Tank
- Point Goblin Dragon Gun into cleared space away from the group. Avoid rotating Gizlock across the healer while repositioning out of Bomb.
- Healer
- Heal from outside the Dragon Gun cone and leave room around yourself for Bomb. Watch players taking Shoot damage even while they are outside the cone.
- Damage
- Stand behind or beside Gizlock rather than in the Dragon Gun cone, and spread for Bomb. Keep beast pets away from uncleared side passages because Flash Bomb can send them fleeing.
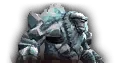
Landslide
Elite GiantLandslide combines ledge-threatening knockback with Trample and a Summon Shardlings stun that leaves the group unable to answer the new attackers immediately.
Abilities
Knock Away
Inflicts normal damage plus 30 to an enemy and knocks it back.
Put solid rock behind the tank so Knock Away does not throw them off the ledge or out of healing range.

Trample
Keep the healer and ranged players away from Landslide's feet to avoid Trample's nearby damage.

Summon Shardlings
Summons Theradrim Shardlings every 2 seconds and stuns enemies in an area for 8 seconds.
Keep the tank healthy before the summon stun, then collect the Theradrim Shardlings as soon as control returns.
- Tank
- Fight with rock behind you for Knock Away rather than your back toward the drop. Collect Theradrim Shardlings when the summon stun ends so they do not remain on the healer.
- Healer
- Stay away from Trample while retaining sight of the tank's wall position. Keep the tank healthy ahead of Summon Shardlings and resume healing promptly when its stun releases you.
- Damage
- Keep ranged attacks outside Trample and switch to the gathered Theradrim Shardlings when the stun ends. Avoid chasing a knocked-back tank toward an uncleared ledge.
Zaetar's Grave
Find Rotgrip in the lake and bring the fight to the bank rather than spreading the group across the water. Clear the approach to Princess Theradras before pulling her: Repulsive Gaze can send players running into anything left nearby. Keep the group together for the climb from the lake to the final chamber.
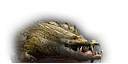
Rotgrip
Elite BeastRotgrip combines Puncture's continuing bleed with Fatal Bite's health drain, testing tank healing while his own health recovers.
Abilities
Puncture
Inflicts Physical damage to an enemy every 2 sec. for 10 seconds.
Keep healing the tank between bites because Puncture continues dealing Physical damage.

Fatal Bite
Recover the bitten player's health promptly; Fatal Bite also heals Rotgrip, so the group must continue dealing damage through that recovery.
- Tank
- Bring Rotgrip to the bank with the healer already in position rather than starting a chase across the lake. Keep him there while Puncture and Fatal Bite concentrate damage on you.
- Healer
- Keep sight of the tank on the bank and heal through Puncture between Fatal Bites. A quiet interval between melee hits does not mean the bleed has stopped.
- Damage
- Attack from the same bank as the tank so nobody draws the fight back across the water. Maintain damage when Fatal Bite restores Rotgrip's health instead of switching away at the apparent loss of progress.
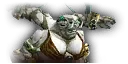
Princess Theradras
Elite ElementalTheradras forces melee away with Dust Field while Boulder disrupts distant players and Repulsive Gaze threatens to scatter the group into the cleared approach.
Abilities

Dust Field
Leave Theradras' immediate area when Dust Field starts and return after its damaging knockback pulses stop.

Boulder
Hurls a boulder at an enemy.
Boulder can interrupt a cast and trigger Knockdown. Recover after the hit rather than relying on a long cast to finish through it.
Repulsive Gaze
Roars at an enemy, paralyzing it with terror for 8 seconds. and causing all other nearby enemies to flee in fear.
Clear the approach before pulling; Repulsive Gaze can send nearby players fleeing into enemies left on the route.

Thrash
Gives the caster 2 extra attacks.
Keep tank healing ready for Thrash's extra attacks, especially while other players are recovering from fear or Boulder.
- Tank
- Choose a position with cleared ground and rock behind you for Dust Field's knockback. Reconnect with Theradras after Repulsive Gaze and keep mitigation available for Thrash's extra attacks.
- Healer
- Cast from outside Dust Field while keeping sight of the tank. Prepare for Thrash bursts and restart interrupted healing after Boulder or fear instead of moving into the pulse to shorten the distance.
- Damage
- Leave melee range during Dust Field, then return after the pulses end. Resume heavy damage once the tank has recovered from Repulsive Gaze; keep your retreat within the cleared chamber.