 Azeroth DB
Blackrock Spire
10 players · Searing Gorge 40.8, 95.6
Blackrock Spire admits up to ten players, with separate Lower Spire and Upper Spire routes from the same entrance. Run Lower Spire for equipment and Upper Spire key components, finishing at Overlord Wyrmthalak; arrange a gate opener before choosing the Upper Spire route through the Stadium to General Drakkisath. Urok Doomhowl and Lord Valthalak are summoned detours, not the required ends of those routes.
Preparation
Agree on Lower Spire or Upper Spire before forming the group. Lower Spire does not require the upper gate to be opened; an Upper Spire group needs a member who can open it.
If collecting Upper Spire key components, keep an Unadorned Seal of Ascension and collect the Gemstone of Spirestone from Highlord Omokk, the Gemstone of Smolderthorn from War Master Voone and the Gemstone of Bloodaxe from Overlord Wyrmthalak. These components are preparation for the key, not a substitute for a gate opener on the current run.
For the Urok Doomhowl detour, collect a Roughshod Pike near the early Lower Spire bridge and keep Omokk's Head after defeating Highlord Omokk. Carry both to the tribute pile beyond the spider tunnels before starting the ogre event.
Assign a second tank before an Upper Spire run. Gyth and Rend can be active together, and General Drakkisath needs another tank ready when Conflagration disables the current one.
If Lord Valthalak is a goal, confirm before entering that a group member can perform the summon. His fight takes place in The Beast's room, so agree to return there after the main Upper Spire route.


Lower Spire: ogres and trolls
Take the Lower Spire descent rather than the locked upper doorway. Cross the bridges into the ogre quarter for Highlord Omokk, then continue through the troll rooms to Shadow Hunter Vosh'gajin and War Master Voone. Pull bridge packs onto a cleared platform, and finish each caster pack before advancing into the next room.
Creatures
- Spirestone MysticElite Humanoid
Spirestone Mystics can undo progress on the ogre pack with Healing Wave. Assign an interrupt to the heal instead of leaving the mystic until the melee enemies are dead.

Healing Wave
Calls upon Nature magic to heal an ally.
- Spirestone Battle MageElite Humanoid
Spirestone Battle Mages cast Chain Lightning that grows stronger as it jumps. Separate ranged players and interrupt the cast before it crosses the group.

Chain Lightning
Strikes an enemy with a lightning bolt that arcs to another nearby enemy. The spell affects up to 5 targets, inflicting greater Nature damage to each successive target.
- Smolderthorn Shadow PriestElite Humanoid
Smolderthorn Shadow Priests burn mana and deal damage with Mana Burn. Interrupt them before the healer loses the mana needed for Vosh'gajin's Hex and Curse of Blood.

Mana Burn
- Smolderthorn Witch DoctorElite Humanoid
Smolderthorn Witch Doctors place Superior Healing Wards. Destroy the ward when it appears rather than fighting the trolls inside its healing area.

Superior Healing Ward
Summons a ward that lasts 30 seconds. and periodically heals allies in an area around it.
Highlord Omokk
Elite HumanoidOmokk tests whether the tank can hold a wall-backed position through Knock Away and survive the increased melee pressure of Enrage.
Abilities

Knock Away
Inflicts normal damage plus 30 to an enemy and knocks it back.
Put the tank's back against a wall so Knock Away cannot launch them off the fighting platform, then settle Omokk before melee players close in again.

Enrage
Reserve tank mitigation and finishing damage for Enrage instead of relying on a health threshold to predict it.
 Tank
Tank- Set your back against the ogre platform's wall before engaging. Re-establish that position after Knock Away and use mitigation when Enrage appears.
 Healer
- Keep the tank in range after Knock Away and have a strong heal ready for the faster melee hits during Enrage.
 Damage
- Leave the wall-backed position to the tank, pause if Knock Away sends Omokk toward you, and save a damage cooldown to shorten Enrage.
Loot

Shadow Hunter Vosh'gajin
Elite HumanoidVosh'gajin combines a nearby-group Hex with Curse of Blood, making separation and the correct debuff removal more important than simply outhealing the pull.
Abilities

Hex
Transforms nearby enemies into frogs, rendering them unable to attack or cast spells for 10 seconds.
Keep healers outside the nearby Hex when possible and remove its magic effect from a disabled healer or tank promptly.

Curse of Blood
Remove Curse of Blood from players taking melee hits; it increases the Physical damage they receive and requires curse removal rather than a magic dispel.
- Tank
- Keep Vosh'gajin apart from the healers so the nearby Hex does not disable the group together. Use a defensive if Curse of Blood remains on you while you are being hit.
- Healer
- Arrange magic removal for Hex and curse removal for Curse of Blood before the pull. Free a disabled healer quickly, then address the cursed tank's increased Physical damage.
- Damage
- Stop accompanying Shadow Priests from casting Mana Burn, then focus Vosh'gajin. If you can remove curses, clear Curse of Blood from the tank while the healer handles Hex.
Loot

War Master Voone
Elite HumanoidVoone combines Cleave and extra melee attacks with Snap Kick, leaving the tank vulnerable while stunned and punishing melee players who stand beside them.
Abilities

Cleave
Keep everyone except the tank out of Voone's front so Cleave does not hit nearby melee players.

Snap Kick
Keep the tank healthy before Snap Kick; the stun can coincide with Voone's additional melee attacks.

Thrash
Gives the caster 2 extra attacks.
Allow for extra melee swings rather than assuming a steady gap between hits, especially while Snap Kick prevents the tank from acting.

Throw Axe
Watch the player struck by Throw Axe and recover their health before the next attack instead of concentrating every heal on Voone's tank.
- Tank
- Give Voone a fixed facing for Cleave and prepare mitigation before a Snap Kick leaves you unable to act during his extra swings.
- Healer
- Keep a health buffer on the tank for Snap Kick followed by Thrash, and spot-heal the player hit by Throw Axe without abandoning the tank.
- Damage
- Attack from behind Voone, outside Cleave. If he turns toward you, stop attacking and move out of his front while the tank regains control.
Loot

Skitterweb Tunnels
Continue beyond Voone through the Firebrand passages into the spider tunnels. Clear the approach before engaging Mother Smolderweb, and leave space behind the tank for the rest of the group to avoid Crystallize. Remove Mother's Milk before moving onward so its immobilizations do not follow the group into another pull.
Creatures
- Firebrand Darkweaver<Firebrand Legion>Elite Humanoid
Firebrand Darkweavers apply Curse of the Firebrand, adding recurring Fire damage during the passage pulls. Remove the curse before advancing into the spiders.

Curse of the Firebrand
Mother Smolderweb
Elite BeastMother Smolderweb tests frontal-cone positioning and poison removal because Crystallize disables players in front while Mother's Milk can immobilize nearby allies.
Abilities

Crystallize
Stuns enemies in a cone in front of the caster, rendering them unable to move or attack for 6 seconds.
Leave the frontal cone to the tank; Crystallize stuns players caught in front of Smolderweb.

Mother's Milk
Poisons nearby enemies. Until the poison is entirely removed from the bloodstream by a knowledgeable medical professional, it will periodically immobilize a poisoned individual and any nearby allies.
Remove Mother's Milk as a poison and avoid clustering around an affected player while it remains, since its immobilization also catches nearby allies.
- Tank
- Hold Smolderweb with Crystallize aimed into the cleared tunnel, away from the rest of the group. Set the position before the cone can stun you.
- Healer
- Stay outside the Crystallize cone so you can heal through the tank's stun. Remove Mother's Milk rather than letting its recurring immobilizations disrupt the next pull.
- Damage
- Work from Smolderweb's sides or rear. If Mother's Milk remains on you, separate from allies until it can be removed.
Loot

Urok's tribute pile
Beyond the spider tunnels, clear the ogres around the tribute pile before using Omokk's Head and the Roughshod Pike. Starting the tribute commits the group to successive ogre arrivals before Urok Doomhowl appears. Regroup at the cleared pile after each arrival instead of following fleeing enemies into uncleared passages.
Creatures
- Urok Ogre MagusElite Humanoid
Urok Ogre Magi cast Bloodlust on their allies. Control the magus or interrupt the buff before the summoned ogres gain faster melee attacks.

Bloodlust
Increases an ally's attack speed by 30% for 30 seconds.
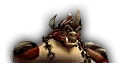
Urok Doomhowl
Elite HumanoidUrok is a summoned ogre-event finish whose Intimidating Roar can remove healing and scatter the group while his melee attacks continue.
Abilities

Intimidating Roar
Roars at an enemy, paralyzing it with terror for 8 seconds. and causing all other nearby enemies to flee in fear.
Clear the space around the tribute before summoning; the roar terrifies its target and sends nearby allies fleeing, so keep the healer away from Urok when possible.

Strike
Strikes at an enemy, inflicting increased melee damage.
Keep a defensive available for Strike while Intimidating Roar has interrupted the group's normal healing.
- Tank
- Collect Urok at the cleared tribute area rather than chasing the last ogre into a passage. Keep mitigation for his Strike when Intimidating Roar disables the healer.
- Healer
- Stand back from Urok's roar and keep the tank healthy before it lands. Re-establish range after a fear without running through uncleared ogres.
- Damage
- During the summoning arrivals, stop the Urok Ogre Magus from granting Bloodlust. Regroup after Intimidating Roar before resuming attacks on Urok.
Bloodaxe Storehouse and Halycon's Lair
Take the uphill storehouse branch for Quartermaster Zigris, then return to the junction for Halycon's lair. Clear the storehouse patrols before Zigris can immobilize the group. Recover before pulling Halycon and keep healing resources for Gizrul the Slavener, who arrives after Halycon dies.
Creatures
- Bloodaxe Raider<Bloodaxe Legion>Elite Humanoid
Bloodaxe Raiders cleave nearby allies of their target. Gather them facing into cleared space, with melee players behind them rather than beside the tank.
Cleave
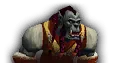
Quartermaster Zigris
<Bloodaxe Legion>Elite HumanoidZigris tests whether the group clears its fighting space and spreads before Hooked Net prevents movement and Stun Bomb disables clustered players.
Abilities

Hooked Net
Immobilizes nearby enemies for 10 seconds. and inflicts Physical damage.
Choose positions in cleared space before the net lands; immobilized players cannot move away from a patrol or separate from a bomb afterward.

Stun Bomb
Separate the tank and healers so one Stun Bomb cannot disable them together.

Drink Healing Potion
Uses a Holy elixir to heal the caster.
Use a stun when Zigris tries to drink his healing potion rather than allowing him to recover health.
- Tank
- Bring Zigris into the cleared storehouse before the group is netted. Keep him apart from the healer so Stun Bomb does not disable both of you.
- Healer
- Take a separate position before Hooked Net immobilizes nearby players. Anticipate a healing gap if Stun Bomb catches you rather than trying to reposition after the net.
- Damage
- Leave space around the healer for Stun Bomb, and reserve a stun to stop Zigris drinking his healing potion.
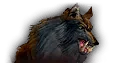
Halycon
Elite BeastHalycon combines a persistent bleed with extra melee swings and leads directly into Gizrul, making the group's remaining healing resources part of the fight.
Abilities

Rend
Inflicts Physical damage to an enemy every 3 sec. for 15 seconds.
Continue healing the bleeding tank through the end of Halycon's fight instead of treating her death as the end of incoming damage.
Thrash
Gives the caster 2 extra attacks.
Keep the tank above the point where extra melee swings can finish them while Rend is already ticking.
- Tank
- Use mitigation when Halycon's extra swings coincide with Rend. Be ready to collect Gizrul after she dies instead of leaving the lair to recover.
- Healer
- Enter the pull with mana for both wolves. Maintain healing on the tank's Rend as Halycon dies and Gizrul arrives.
- Damage
- Keep a finishing cooldown for Gizrul rather than spending every cooldown on Halycon, and let the tank collect the arriving wolf before attacking it.
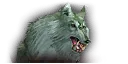
Gizrul the Slavener
Elite BeastGizrul arrives after Halycon and combines a healing bite with a disease that makes his victim take more Physical damage.
Abilities

Fatal Bite
Fatal Bite restores Gizrul's health while hurting his victim, so keep damage concentrated on him and recover the tank immediately after the bite.

Infected Bite
Inflicts Nature damage to an enemy every 10 sec. and increases the Physical damage it takes for 3 minutes.
Remove Infected Bite as a disease. Its increased Physical damage taken makes leaving it on the tank dangerous even when its periodic damage looks manageable.
Enrage
Keep tank mitigation and remaining damage cooldowns for Enrage, especially if Infected Bite is still on the tank.
- Tank
- Collect Gizrul as he reaches the lair after Halycon's death. Use a defensive while Infected Bite remains and keep another response for Enrage.
- Healer
- Remove the Infected Bite disease from the tank and replenish health after Fatal Bite. Carry any remaining Halycon bleed into that healing plan.
- Damage
- Wait for Gizrul's pickup, then commit the cooldowns saved from Halycon to overcome Fatal Bite's healing. Help remove the disease if your abilities permit it.
Loot

Chamber of Battle
Climb from the worg section to Overlord Wyrmthalak's chamber. Clear the approach and give the tank a position against the far wall before the pull. Keep the ramp visible for reinforcements, and leave the boss's front clear for Sweeping Slam. Wyrmthalak ends the Lower Spire route; Upper Spire starts back at the shared entrance.
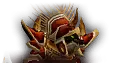
Overlord Wyrmthalak
Elite DragonkinWyrmthalak ends Lower Spire with frontal Cleave and Sweeping Slam while reinforcements threaten the group's control of the ramp.
Abilities
Cleave
Keep melee players behind Wyrmthalak so Cleave cannot strike them beside the tank.

Sweeping Slam
Inflicts normal damage plus 50 to enemies in a cone in front of the caster, knocking them back.
Put the tank's back against the far wall and keep the rest of the group outside the frontal cone to limit Sweeping Slam's knockback.

Demoralizing Shout
Expect reduced melee attack power while the shout is active and keep damage focused rather than letting the fight spread toward the ramp.
- Tank
- Hold Wyrmthalak against the wall beyond his starting position so Sweeping Slam cannot throw you down the approach. Assign someone else to collect arriving reinforcements without turning his front through the group.
- Healer
- Heal from outside the Cleave and Sweeping Slam cone, with a view of the ramp so you can react when the reinforcement handler begins taking hits.
- Damage
- Attack from Wyrmthalak's rear and reserve crowd control for reinforcements reaching the ramp. Keep them off the healer while the tank maintains the wall-backed position.
Loot

Upper Spire: Dragonspire Hall and Hall of Binding
Return to the shared entrance and take the Upper Spire route through its locked gate. Clear the rune rooms before proceeding to the Blackrock Altar. Gather the group before activating the altar, defeat the Blackhand Incarcerators and prepare for Pyroguard Emberseer to become free. Ranged players should already have room to retreat from Fire Nova.
Creatures
- Blackhand Dreadweaver<Blackhand Legion>Elite Humanoid
Blackhand Dreadweavers apply Curse of Thorns, which can damage a cursed player when they attack. Remove it before a melee player continues a rapid attack sequence.

Curse of Thorns
- Blackhand Incarcerator<Blackhand Legion>Humanoid
The Blackhand Incarcerators around Emberseer become the first targets of the altar event. Collect them together before the group attacks; their Strike adds melee pressure while the group is preparing for Emberseer's release.
Strike
Strikes at an enemy, inflicting increased melee damage.
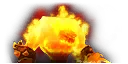
Pyroguard Emberseer
Boss ElementalEmberseer's release turns the altar event into a Fire-damage fight where Fire Nova punishes nearby players and Flame Buffet makes repeated hits more dangerous.
Abilities

Fire Nova
Inflicts Fire damage to nearby enemies.
Keep ranged players outside Fire Nova's nearby area rather than leaving the whole group beside Emberseer after his release.

Flame Buffet
Remove Flame Buffet's magic effect from affected players to reduce the danger of subsequent Fire damage.
- Tank
- Finish collecting the altar's Incarcerators before Emberseer is released, then establish him apart from ranged players so Fire Nova does not reach everyone.
- Healer
- Remove Flame Buffet when possible and allow for the Fire Nova damage taken by players who must remain close. Take your ranged position before Emberseer becomes free.
- Damage
- Finish the Incarcerators before committing to Emberseer. Ranged players should leave Fire Nova's area; melee players should watch Flame Buffet before committing to another close-range attack sequence.
Loot

The Rookery and Blackhand Stadium
Cross the Rookery along a cleared edge without walking through the eggs, then continue through the Hall of Blackhand to the Stadium. Bring everyone down into the arena before starting its event. Handle the incoming orcs and dragonkin before Gyth arrives carrying Rend; have the second tank ready for Rend's dismount while the first still holds Gyth.
Creatures
- Rage Talon FlamescaleElite Dragonkin
Rage Talon Flamescales cast Flamestrike at a selected area. Interrupt the cast where possible and move out of the burning ground rather than remaining there to finish an enemy.
Flamestrike
Calls down a pillar of flame, burning all enemies in a selected area and inflicting additional damage every 2 sec. for 8 seconds.
- Rage Talon Dragon GuardElite Dragonkin
Rage Talon Dragon Guards cleave their target's nearby allies. Keep each guard's front away from the players handling the other arrivals.
Cleave
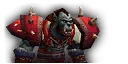
The Stadium ends with Gyth's frontal breaths followed by an overlap with Rend, requiring a second tank and a move out of Rend's Whirlwind.
Abilities

Freeze
Sends out an ice blast that stuns and damages enemies in a cone in front of the caster, then inflicts additional Frost damage every 3 sec. for 10 seconds.
Gyth's Freeze stuns and damages players in a frontal cone. Leave that cone to his tank instead of standing beside the tank when Rend dismounts.

Corrosive Acid Breath
Shoots a cloud of acidic breath at enemies in a cone in front of the caster, reducing their armor and inflicting Nature damage every 5 sec. for 30 seconds.
Keep Gyth's Corrosive Acid Breath directed away from the group; the armor loss and Nature damage make a shared frontal position dangerous.

Flame Breath
Gyth's Flame Breath also hits a frontal cone. Keep his facing stable while the other tank collects Rend.

Whirlwind
Leave Rend's melee area during Whirlwind and return after the spinning attack ends; the second tank should keep him apart from Gyth during the overlap.
- Tank
- Keep the first tank on Gyth with every frontal breath facing away from the arena group. The second tank collects Rend on dismount and separates him from Gyth without turning the dragon through the healers.
- Healer
- Account for the armor loss from Gyth's Corrosive Acid Breath and the period when both tanks take hits. Keep a position outside both Gyth's cone and Rend's Whirlwind.
- Damage
- Finish Gyth while the second tank holds Rend. Stay away from Gyth's front, then withdraw from Rend's Whirlwind instead of continuing melee attacks through it.
Loot

The Furnace
After Rend, climb out of the Stadium into the Furnace and clear the approach to The Beast's room. Clear nearby enemies before pulling, since Terrifying Roar can send players running and Flamebreak can displace the tank. Preserve the cleared room for a possible Lord Valthalak return.

The Beast
Boss BeastThe Beast disrupts a stable tank position with Flamebreak, a charge and Terrifying Roar, so the cleared room must remain safe when players are displaced or feared.
Abilities

Flamebreak
Inflicts Fire damage to nearby enemies, knocking them back.
Brace the tank against a wall to limit Flamebreak's knockback, and keep ranged players away from its nearby Fire damage.

Berserker Charge
Charges at an enemy, knocking it back and inflicting normal damage plus 300.
Berserker Charge can send The Beast away from his tank. Give the tank a clear return path instead of following the boss toward an uncleared passage.
Terrifying Roar
Causes nearby enemies to flee in fear for 5 seconds.
Clear nearby packs before Terrifying Roar can send players fleeing into them, and keep ranged healers back from the nearby fear when possible.
- Tank
- Use the cleared room's wall against Flamebreak. After Berserker Charge, restore that position without dragging The Beast through the ranged group or into another pack.
- Healer
- Heal from back in the cleared room to reduce exposure to Terrifying Roar. Be ready to heal a charge victim while the tank recovers from displacement.
- Damage
- After a charge, let The Beast return to the tank's wall rather than chasing him into a passage. Resume melee attacks only after his position is settled.
Loot
Drakkisath's chamber
Continue from the Furnace to General Drakkisath and the Chromatic Elite Guards. Decide who will separate the general from his guards before pulling, using the cleared route behind the group. Defeat the guards first, then establish the tank and second-threat positions for Conflagration. Drakkisath ends the main Upper Spire route.
Creatures
- Chromatic Elite GuardElite Dragonkin
Chromatic Elite Guards accompany Drakkisath and use Strike for increased melee damage. Assign their tanks before the pull and focus one guard at a time while the general is separated from them.
Strike
Strikes at an enemy, inflicting increased melee damage.
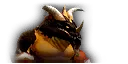
General Drakkisath
Boss DragonkinDrakkisath requires a controlled opening against his guards and a second tank ready when Conflagration disables the current tank and scorches nearby allies.
Abilities

Conflagration
Sets an enemy aflame, inflicting 3000 Fire damage over 10 seconds. and sending it into a state of panic. While the target is affected, the flames periodically scorch its nearby allies for 300 damage as well.
Keep a second tank next in threat for Conflagration and leave space around the burning target so nearby allies are not scorched as well.

Flame Breath
Aim Flame Breath into empty space and keep damage dealers and healers out of the frontal cone during tank changes.

Pierce Armor
Reduces an enemy's armor by 75% for 20 seconds.
Use mitigation and direct healing when Pierce Armor reduces the current tank's armor, rather than treating the next melee hit as an ordinary one.
- Tank
- Separate Drakkisath from the Chromatic Elite Guards while their tanks collect them. Once the guards are dead, maintain a second tank next in threat; after Conflagration, the recovered tank rebuilds threat behind the new active tank without turning Flame Breath through the group.
- Healer
- Keep space from the Conflagration target and switch attention to the tank now taking Drakkisath's melee hits. Anticipate heavier Physical damage when Pierce Armor is active.
- Damage
- Kill the assigned Chromatic Elite Guard before switching to the other, while Drakkisath is separated. During the boss fight, stay clear of his front and the Conflagration target, and leave the second tank room to take over.
Loot


Return to The Beast's room
For an optional Lord Valthalak summon, return to The Beast's cleared room after the main route. Set spread positions before summoning and keep the tank apart from the ranged group. Assign damage dealers to break away from Valthalak immediately when a summoned enemy begins Defile.
Lord Valthalak
Boss HumanoidValthalak is an optional summon in The Beast's room that demands spread positions for Shadow Wrath and immediate damage on any enemy channeling Defile.
Abilities

Shadow Wrath
Spread the ranged group and keep the tank isolated so Shadow Wrath cannot chain through players standing together.

Defile
A summoned enemy channels Defile on a player. Kill its caster to release the stunned player; healing alone does not prevent the lethal completion.

Shadow Bolt Volley
Hurls missiles of dark magic, inflicting Shadow damage to nearby enemies.
Use remaining damage and healing cooldowns when repeated Shadow Bolt Volleys begin, without collapsing the spread needed for Shadow Wrath.
- Tank
- Keep Valthalak apart from the ranged spread so Shadow Wrath cannot jump from you into a cluster. Maintain that separation when damage dealers move to a Defile caster.
- Healer
- Keep your own spread position during Shadow Wrath, call out a player trapped by Defile, and save group recovery for repeated Shadow Bolt Volleys. Defile requires the caster to die, not a larger heal on its victim.
- Damage
- Switch immediately from Valthalak to an enemy channeling Defile, then return to your spread position. Commit remaining cooldowns during the repeated Shadow Bolt Volleys.
Loot


 WoW Forever library books: all 40 locations and Friend of the Library rewards